29 January 2011

Relaxed and rewaxed

Around the time we bought our house I was flipping through the newspaper and came across a collection of quotes about food. I cut out one from Julia Child and hung it on the fridge. "The dinner hour is a sacred, happy time when everyone should be together and relaxed," it read.

I grew up in a house where my mom cooked and my family sat together at the dinner table, and passed the corn, peas and casseroles around the table. As my husband and I settled into our new home, I decided I wanted to put the quote on the wall of our breakfast nook.


Just like I thought a coat of white paint would make a faux brick backsplash slightly less hideous, I thought putting that quote on the wall would will a lifetime of magical family mealtimes upon us. I was idealistic to say the least. I didn't truly understand what it really meant to be the one in charge of putting dinner on the table for a family. Those were the days when we had the extra money to buy Frenched lamb and a bottle of Pinot Noir, the time to talk leisurely about our future while we cooked and the energy to watch an entire movie afterward.

These days cooking dinner is really the side show. In addition to browning meat, firing up the oven and grating cheese, I am trying to console a baby who just wants to be held and a 2-year-old who wants nothing other than my undivided attention. Some nights, I put the baby in the front carrier, let the toddler pull a stool to the counter and ignore the cheese ground into the bottoms of his socks, the kosher salt ring around his lips and my own common sense to not do things like dice onions while you cannot see your fingers because of the baby on your chest.

Then, when we actually make our way to the table, we begin an entirely new challenge that usually involves threats like, "If you throw the fork, you will not get it back," and "We will clean up all of the red sauce when we're finished, so you do not need napkin number 592 right at this moment."

Recently, my 2-year-old took notice of the quote and started asking us to read it to him. He now has it memorized but nonetheless asks me to read it to him several times at each meal. I say it slowly, letting him say it along with me. And we always share a laugh at the end because he can't quite enunciate the word "relaxed." It comes out as "re-waxed."

That part is comical to me, anyways. Julia didn't have kids. And if you do, the dinner hour is likely not relaxing. It's a difficult, crazy, anxiety-inducing time of day that leaves many well-intentioned moms thinking that McDonald's may not be that bad.

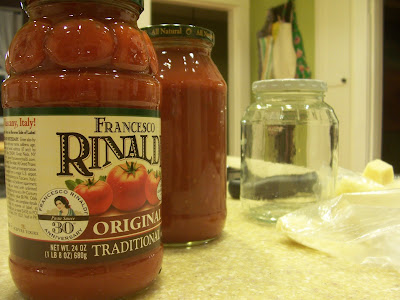
This is why I never let my pantry be without two things: a jar of red sauce and pasta. I make a homemade red sauce that is delicious in everything from lasagna to pizza, but I'm also in touch with reality.

Here's my red sauce recipe. And when you're picking up the ingredients at the grocery store, just go ahead and throw a jar of the store-bought stuff in your cart, too. Surely by Friday you'll be thanking yourself.



Homemade Red Sauce

2, 28-ounce cans of whole tomatoes

1, 6-ounce can of tomato paste

1 medium onion, diced

1/4 cup red wine
pinch of red pepper flakes
salt and pepper to taste
olive oil


Special equipment: immersion blender or food processor.

Coat the bottom of a heavy-bottomed stock pot with olive oil and heat to medium. For best results do not use a non-stick pot. Add onions and cook on medium heat until tender and lightly browned. Add wine and continue to cook, letting wine reduce and scraping the bottom of pan, about 4 to 5 minutes or until alcohol smell is gone. Add tomatoes and tomato paste and red pepper flakes. Stir to combine and let simmer for about 30 minutes. Puree the mixture either in the pot with an immersion blender or in batches with a food processor. Season to taste. At this point the sauce could be served immediately, cooled completely and frozen or refrigerated. To use for a pizza, return to heat and allow sauce to reduce and thicken for about another hour on low heat.

Variation: For a meat sauce, begin by browning sausage. Once cooked through, remove sausage and cook onions in sausage drippings. Continue with recipe.

23 January 2011

Friends, a family favorite


When I am with my girlfriends, all of whom are fellow moms, it doesn't take too long for the conversation to turn to food. The talk isn't about hot restaurants, new trends or their latest gluten-free recipe. It's about grocery shopping strategy, how to pinch pennies and what is the latest dish the kids loved.

If you're a mom who cooks, the next meal is never more than a couple of hours away, so it's only natural that we swap tips and ideas. If any of you can better explain this, please send the memo to my husband, who doesn't understand why I go to events called "book club" and "craft night" and come home with recipes and gossip.

One of those recipes that always comes up is my friend Dina's chip casserole. Under all normal circumstances, we are a group of moms who do not consider tortilla chips a main ingredient in any well-rounded meal. But there are exceptions, and this is one.


Dina received this recipe from a friend of hers named Kristin, and on the hand-written recipe card with worn corners and a smudge or two, she wrote a note: "The first reunion at Kristin's house for us. She made this but put it on the hot burner. The glass ruined it. So funny."

I'm guessing the glass dish broke under the direct heat, a phenomenon I first saw myself when I was about 8 and my dad tried to reheat leftover tuna casserole on the stovetop. Funny, indeed.

Take away these two things from this post: First, make this chip casserole. Second, jot down a little story about a recipe when you get it from a friend. Then, you'll have more than a family dinner favorite. You'll have a memory to last a lifetime.

Santa Fe Casserole
otherwise known as Chip Casserole


1 pound lean ground beef
1 package of Lawry's Taco Seasoning
2 cups of chicken broth
1/4 cup flour
1 cup sour cream
1, 7-ounce can of diced green chiles
1, 11-ounce package of tortilla chips
2 cups grated jack and cheddar cheeses
sliced green onions for garnish, if desired

In a medium skillet brown and crumble beef. Drain fat and discard. Remove meat from heat and add taco seasoning. In a small bowl combine broth and flour. Add the broth mixture to meat and heat over medium-high until liquid comes to a slow boil to thicken. Stir in sour cream and chiles. Turn off heat. Spread chips evenly in a 9 x 13 greased glass baking dish. Pour beef mixture over chips. Layer with cheese and top with green onions. Bake uncovered in a 375 degree oven for about 20 minutes or until cheese is melted and slightly browned. Let stand five minutes before serving.

Notes: I left out the chiles and still loved the dish. I added a little avocado and tomato salad on the side. Next time I might use less meat and add beans to the meat mixture.

03 January 2011

Organized, for a day at least


I would not peg myself as a disorganized person. Sure I'm fine with keeping the mail in piles and I don't fold my underwear, but I do like the laundry put away and dishes seldom sit in my sink.

My husband, however, is what I'll call hyper-organized. And I'm being nice. He comes by his OCD tendencies naturally. From his sock drawer to desktop, everything has a place. When my things invade our common spaces such as the closet, the bathroom cabinet or, heaven forbid, the garage, he gets a bit cranky. To his credit, he has left the kitchen alone, letting me organize the way I want. It is considered my territory, and he knows that if he gets too involved, I might expect him to cook. So he stays clear, and I stay happy.

But just the other day as I opened the pantry a thin plastic sack filled with farina cereal fell out of the pantry and whopped me on the head. I looked up at a shelf stuffed with bags of other bulk-bin goodies: dried beans, oatmeal, brown sugar, couscous, quinoa and rice. "It looks like someone with dementia lives here and can't remember we already have oatmeal in the pantry," I said aloud. Seth laughed, his smirk revealing an unsaid I-told-you-so.

I'm not big on New Year's resolutions. I sometimes have trouble finishing somethings I start. Case in point: The scarf I began knitting about four years ago still sits on a shelf, needles the in yarn. Every time Seth comes across it, he threatens to throw it away, while I expel some verbal vomit about how I'll finish it some day.

So, here's my non-resolution goal. As my family tries a bit harder to stick to a budget, I am trying to be a more resourceful cook, making sure I make the best of everything in my pantry. Instead of sharing a recipe right now, I'm going to share a couple of tips for keeping your pantry in order. It's nothing revolutionary, but if you're like me any reminders about how to organize might just come in handy. And just like I say I'm going to finish that scarf, in all honesty, my pantry will not stay organized for the entire year. We're hoping to make it through Friday. Nobody's perfect.

  • Keep pantry items in see-through containers. I like to use glass canning jars. They are cheaper than Tupperware, are dishwasher safe and will come in handy for a zillion other uses (leftovers, craft supplies, vases, candle holders, etc.). Leftover glass jars from jams, applesauce or red sauce work, too.
  • Labeling items isn't a bad idea, especially if you don't cook often and may have some dried beans around from a pre-Obama era. Labels should include the name of the item and the date it was purchased.
  • A major piece of keeping a commercial kitchen in order and on budget is inventory. It makes sense that we'd do that with our home kitchens, too. I'm not suggesting you work up a spread sheet -- unless that's your thing -- but do come up with a way to ensure you're not buying new items when you've already got them in your pantry. A simple check of your pantry before you shop is good, or you could create a place to keep track when you use the last of a certain item.
  • I used to buy canned beans and tomatoes on every trip to the grocery store. Then, should I have a week when I didn't make a chili, I began to look like I was stocking up for the Apocalypse. Don't do this. Follow that inventory tip from above.
  • I love a pantry filled with single ingredients such as dried beans, rices, cereals, sugars, canned tuna, tomatoes, dried fruits and nuts. My theory is that building a pantry around those single items gives you so many more choices when it comes to cooking. After all, the Rice-A-Roni will yield you only Rice-A-Roni, but a pantry full of rices could mean risotto, jambalaya, casserole or a stir fry on any given night.
  • If letting go of a package with cooking instructions gives you a slight panic attack, simply cut out the instructions and tape them to the container or store them right inside with the ingredient. I always forget the water-to-rice ratio and cooking times for different rices, so I keep a chart handy.
  • And finally, if you know a great way to organize your freezer, let me know. Maybe I'll tackle that in 2012!

01 January 2011

A crust to count on

Every cook needs a good pie crust recipe. Even if you've never made pie before, you at least need one stored somewhere in the kitchen. Eventually, nearly every cook, no matter how skilled, gets a hankering for making a pie.

There's Thanksgiving, the king of all pie holidays. And come July, those fresh peaches will need to go somewhere. And the brunch you want to host would be amazing if you could whip up a quiche.

Done. Here it is. Any pie crust is just a combination of fat and flour plus a little water. But despite being so simple, there are bad crusts out there. You've likely had one. If you're like me, you've even made one (or several). That's because the trick to pie crust isn't in the ingredients but in the technique.

This one comes from The New Best Recipe cookbook from Cook's Illustrated. If you ever wanted to know why your cookies are flat, your brownies not crackled on top or your pie crust is tough, this is the book for you.

Basic Pie Dough from The New Best Recipe cookbook
Enough for 1 double-crust 9-inch pie

2 1/2 cups unbleached all purpose flour, plus more for dusting the work surface
1 teaspoon salt
2 tablespoons sugar
1/2 cup vegetable shortening, chilled
12 tablespoons (1 1/2 sticks) cold unsalted butter, cut into 1/4-inch pieces
6 to 8 tablespoons ice water

1. Process the flour, salt and sugar in a food processor until combined. Add the shortening and process until the mixture has the texture of coarse sand, about 10 seconds. Scatter the butter pieces over the flour mixture; cut the butter into the flour until the mixture is pale yellow and resembles coarse crumbs, with the butter bits no larger than small peas, about ten 1-second pulses. Turn the mixture into a medium bowl.

2. Sprinkle 6 tablespoons of the ice water over the mixture. With a rubber spatula, use a folding motion to mix. Press down on the dough with the broad side of the spatula until the dough sticks together, adding up to 2 tablespoons more ice water if the dough will not come together. Divide the dough into 2 balls and flatten each into a 4-inch disk. Wrap each in plastic and refrigerate at least 1 hour or up to 2 days before rolling.