21 December 2010

The perfect gift

For weeks, we've known the combination of a new baby in our house and a sour economy would keep Christmas gift giving to a minimum for us this year. We had no idea how much we ultimately would want just one thing, though: the health and happiness of our family.

A couple of weeks ago I called my sister to let her know that we wanted to make sure everyone was on board with not having a major giftapalooza for the kids. It was then she told me that their Christmas was going to be about experiences this year. You know, looking at lights, building a gingerbread house and hanging out as a family. I agreed that sounded fantastic. Her family dealt with job loss, and ours keeps seeing our income shrink with furloughs, rising health care costs and our choice for me to stay at home with our boys.

In the past few days my family's collective blood pressure has risen dramatically as we got word that my 3-year-old niece was being checked for lymphoma. And this came just about a week after my sister was called back for a follow-up after something was spotted during a routine mammogram. Thankfully, doctors have assured the family that everyone is well.

While we waited for answers I worried, mostly for my sister who had to put on a brave face to not alarm her daughters. I am just beginning to see that the really tough parts of parenthood don't come when your kid wakes up for the umpteenth time with pee-soaked sheets. The grueling part comes when you have to face our imperfect world and lead your child through it.

I am trying to take this moment to let go of a few minor stresses and remember what I am really grateful for this Christmas. For me, that's knowing what is truly worth worrying about and what is not. Merry Christmas, and I hope your Christmas wish is granted, too.

Here are my low-stress, low-cost and, I hope, fun Christmas gifts:


Homemade Cocoa Mix
(adapted from an Alton Brown recipe)
2 cups of powdered sugar
1 cup of cocoa powder
2 1/2 cups powdered milk
1 teaspoon salt
2 teaspoons corn starch
*Vary by adding a pinch of cayenne, crushed peppermints or mini chocolate chips.

***

Marshmallow Snowman Kit


If you want an afternoon project that may not be as involved as an entire gingerbread house, this is a fun one. Just melt white chocolate and use it like glue to stack different sizes of marshmallows. Or just give them a dunk in the melted white chocolate and then a pile of your favorite sprinkles, dark chocolate chips or candies.

01 December 2010

A wee bit neglectful

I've not had much free time lately, so that's my excuse for neglecting my blog.

We had our high about a month ago when Carter was born, and, we've hit a low in terms of parenting moments. My adorable 2-year-old is acting like, well, a 2 year old. Who just got his mom stolen. It sounds so rational. In reality, however, it makes me very irrational. Like thinking I could keep him from getting every drop of water from the tub onto the bathroom floor. Nope. Or trying to keep him from peeing all over his bed. Not gonna happen. And wanting so badly for him to stop hurling toys out of the car while he kicks and screams about getting buckled in. Uh-uh.

Luckily this week I did find some motivation, even if it had nothing to do with parenting (perhaps it was because it had nothing to do with parenting). Some friends of ours had their own new baby to celebrate, and knowing how miserable the hospital food can be, I packed up a dinner (take-out, folks) and a few slices of some of the best banana bread I've made. And since I'm in no position to be cocky right now, I give all the credit to this recipe, which I followed precisely.

The recipe is from Orangette, this adorable food blog from an Oklahoma-raised, Seattle-living writer. I have a love-hate relationship with this woman I've never met. I feel like because we're both Northwest transplants from Oklahoma that we should have more in common. She, however, has an insanely popular food blog, a published food memoir and a regular column in Bon Appetit. Don't get me wrong, I have a lot to be thankful for, but in my sappy state, I feel like all I've got right now are stretch marks, early onset dementia and an endless pile of laundry. Seriously, which one of us do you envy?

But, all that aside, I do continuously go back to Molly Wizenberg's blog. The stories are usually charming and the recipes she shares are approachable, or at least she makes them seem that way, spinning a fun little story about where the recipe came from -- a dinner party, a childhood friend's mom or her late father.

If Banana Bread with Cinnamon Crumble Topping doesn't sound delicious enough, check out one of her other banana bread recipes like this one or this one.

There are no shortages of excuses for baking this month, so preheat the oven and pull those blackened bananas out of the freezer.

13 November 2010

Thank you to my village

I've never considered myself a great writer, and let me just say that these days I'm doing great to finish a simple train of thought like "Go upstairs, pee, get diapers and burp cloth." So, you can only imagine that actually writing, as in sitting down at the computer and willing my fingers to translate the thoughts swirling in my head is a daunting task.

If you're not a regular around here, you may be wondering if I just had a stroke. Well, not exactly. Two weeks ago today I gave birth to my second little boy. It was a whirlwind experience -- other mommas speak up here and say, "What labor and delivery isn't?" -- that had been building for weeks. I'd been saying I couldn't have this baby until Oct. 30 when my mother flew in from Oklahoma to help out with Jasper. Feeling like labor was indeed starting but not in full swing, I picked my mom up from the airport, took her and Jasper out to dinner, bathed the boy and put him to bed and then decided I better get my butt to the hospital, and quick. Just five hours after my mom arrived, Carter Kenneth was born.


In the days following, I was reminded of all of the unpleasant bits of delivering a baby. There's the sweating, the mental and physical exhaustion and the mad, mad paradox of healing while caring for a tiny human being (even if they weigh 9 pounds and 6 ounces at birth). And, of course, there are many more hiccups that just aren't fit for discussion on a food blog.

But thankfully, I was also reminded of how much my family is loved. Grandmas are flying halfway across the country to do my laundry, unload my dishwasher and give me an extra set of hands while I figure out this new role of motherhood. Then there are the friends and neighbors who are dropping by with lasagnas, enchiladas, hand pies, muffins and casseroles. And this gravy train isn't ending just yet, with more friends scheduled for food drops in the coming weeks.

It may be overused, but the old It-Takes-A-Village saying couldn't be more true. And I am so thankful for this village surrounding my little family. Everything from our friends Dan and Juliana who came to sit with Jasper and drive Seth to the hospital the night I delivered Carter to the offers to take big brother off my hands for a few hours are so dear. We are blessed in more ways than one.

Too often, I think, we keep our distance from friends and neighbors, thinking they need their space when a new baby is born, a relative is sick or any of the other stresses of life press upon us. But in reality, that's probably when they need us most.

So next time you have a friend or neighbor in need, drop off a casserole or a batch of muffins. It's possible to do without being intrusive, and a small effort goes a long way to helping a family. And just in case you need an idea, here's an awesome recipe for a Black Bean Pie that was delivered to me by my friend Kim.

Delivering a casserole won't change the world, but it just might change someone's outlook, even for just a day. And let's be honest, when you've got a new baby to care for, you're not thinking much further out than that anyways.

Black Bean Pie

1 clove garlic minced
2 cans black beans drained and rinsed
28 oz diced tomatoes with most of juice
3 oz tomato paste
1 tsp ground cumin
juice of half a lime
pre-made or homemade pie crust
shredded cheddar or blend cheese to suit taste
*If you want to sneak in another veggie you can add a chopped yellow pepper in the final 5 minutes of the simmer.
*Before I pour in the tomato mix I pour off a little juice if it seems too runny. After it is baked it is best to give it a few minutes to set up before cutting.
Preheat oven to 350. In a sauce pan brown the garlic in olive oil. Add beans, tomatoes, tomato paste, cumin and lime. Bring to a boil, reduce heat, cover and simmer for 30 minutes, stirring occasionally. Shape on half of pie crust in a pie pan. Pour bean mixture into bottom of the crust, top with a layer of cheddar, then cover with the other half of the pie crust. Pinch top and bottom of pie crust together;make several slits in the crust with a knife. Bake pie for approximately 35 minutes or until the crust is slightly brown around the edges.

26 October 2010

Thank you, Mrs. Faltz


About a month ago I got tired of looking at the empty bookshelf tucked into the end of my kitchen island. Before Jasper, it was the spot where I kept the part of my cookbook collection I reached for most. My Better Homes and Gardens, the three-ring book that holds a mishmash collection of newspaper clippings and hand-copied recipes. And more than a dozen old cookbooks I've picked up over the past 10 years.

I figured Jasper was old enough to at least not tear the books up. Much to my surprise, the problem we've had with them doesn't have to do with him mishandling them. In fact, it's the opposite. He frequently pulls a book off the shelf -- at perfect eye-level for a 3-foot-tall boy -- and starts flipping through the pages. He talks to himself about the books and seems fond of the ones with pictures.

Today he plucked a small, tattered book from the shelf, and given its frail spine, I replaced it with another book and took "Magic Chef Cooking," copyright 1935, into my own hands. As I set it down on the counter, a loose piece of paper fell out. I picked it up and warmed just a bit at the penciled scrawl. I didn't really care what the recipe was, I just love reading anything that someone wrote by hand, and given the age of the book, my heart pumped just a bit faster thinking of how long that recipe may have been lost in the pages of the book.


The recipe was for Pumpkin Cookies by Mrs. P.E. Faltz and references Hobart, Okla., not surprising since the receipt tucked into the front of the book reminded me I'd picked it up at an antique store in north Oklahoma City on a visit home for Christmas about five years ago.

After reading through the recipe, I knew it was very similar to this one I'd made before. But that didn't matter much to me. With bright orange, red and yellow leaves falling in our neighborhood streets and the first real rain storm of the season pressing down, pumpkin cookies seemed perfect.

I enlisted Jasper's help to dump flour, cinnamon and sugar into the mixing bowl, and he had fun using the crank nut grinder to chop the walnuts. Much like the previous pumpkin cookies I'd made, the texture of these cookies didn't fit what I'd call a traditional cookie. They don't spread, but bake pretty much in the round you drop them onto the cookie sheet. And they are soft, not crispy. They remind me of some type of breakfast pastry, actually, but that didn't stop me from eating a couple of them at 4 in the afternoon.


I'll keep this recipe around. In an era where I make many recipes looking right at my laptop and never see them printed on paper, it's a nice reminder that a handwritten recipe or margin notes are sometimes more valuable than the books they're tucked into.

Mrs. P.E. Faltz's Pumpkin Cookies

1 cup sugar
1 cup pumpkin puree
1/4 cup shortening
1 egg
1 teaspoon vanilla
1 cup of dates or raisins, chopped
1/2 cup nuts
1 teaspoon baking soda
1 teaspoon baking powder
1 teaspoon cinnamon
2 cups flour

Beat sugar, pumpkin and shortening together . Add egg and continue beating. Add all other ingredients and mix well. Drop by the teaspoonfuls on greased cookie sheet and bake at 375 degrees for 10 to 12 minutes. Ice with powdered sugar icing, flavored with orange juice or maple. Makes about two dozen cookies.


27 September 2010

The crazy cake trials and trail


Nerd alert. Not as in quantum physics and mathletes, but the kind of nerd who kind of became a little obsessed with a certain cake recipe. It started by taking a few simple notes. That led a very pleasant conversation with a culinary historian named Sandy Oliver in Maine. And more research flipping through cookbooks on my own shelves, online and even researching product histories.

See, bona fide nerd.

If you want to just see this stinking cake recipe, click here. Otherwise, indulge me, and keep reading.

This whole thing started with Jasper's birthday. When you turn 2, it only seems right to have your mom make you some cupcakes. And, yes, I probably could have gotten away -- guilt-free, even, perhaps -- with a box mix. After all, I'm eight months pregnant, and despite the fact that I cooked for 80 people a month ago, baking for a half-dozen neighbor kids sounded like a lot of work. But, I decided it would be fun to test a couple of recipes, and I had a few events I needed to bake for anyways, so off I went in search of a simple chocolate cake recipe.

It's not that a chocolate cake recipe is a hard thing to track down. Every comprehensive cookbook I own has at least four or five of them. The real trouble is winnowing down the list and picking one to try. I started by reading a bit of "Cookwise" by Shirley O. Corriher where I caught up on the importance of fats helping to aerate a cake.

That's what led me to a Southern Living cake recipe that started with shortening, an excellent fat to start a cake off right given the gas bubbles already nestled inside a stick of vegetable shortening. Well, much to my disappointment, that cake wasn't really that great. The texture wasn't a fine, moist crumb, but a chunky tough one with a crust that made no attempts at hiding its flaws.

Two days after baking that version, I received a magazine in the mail called Cuisine at Home, a publication I'd never heard of but assumed came via my subscriptions to other food magazines. The last two pages were devoted to an Old-Fashioned Chocolate Cake recipe. I read through the recipe and the accompanying text that boasted this as the cake your grandmother made. And not only that, it said the cake was simpler than a box mix. This, I had to try.

It wasn't until I started mixing this cake batter at about 9 o'clock one night last week that I realized I already knew this recipe. I hadn't baked the cake before, but I'd read this recipe. I knew the exact cookbook I'd seen it in, some community cookbook from New Mexico that I'm pretty sure came from a stack of cookbooks from my grandmother's house. It was the very first recipe in that book and was called Crazy Teenage Cake. Seriously, how could I not remember that?

What was odd about it the recipe is that it had no eggs, used vegetable oil for its fat and contained vinegar. Again, how could I not remember that?

As I waited for that cake to bake last week, I thumbed through my bookshelves and found that community cookbook and turned to that recipe. I sat, dragging my index finger through the batter clinging to the side of my mixing bowl and then licking it, again and again (remember, no eggs, even this pregnant woman can indulge in this cake batter) and compared the recipe from the magazine to the one in that book. The only difference is that the recipe from the magazine, which is surely armed with a test-kitchen staff, offered more precise instructions. It also struck me as odd that the cake was vegan, well before that trend caught the bandwagon, at least in this country.

I started poking around and discovered a few things. And to be fair, although I'm a nerd, I'm no historian, but here goes: During World War I, there was a shortage of meats, butter, eggs and lard, so ingenious cooks started coming up with ways to use what they had, including creating cake recipes without these ingredients. This also follows shortly behind the turn-of-the-century trend of baking with cocoa thanks to manufacturers such as Hershey's giving home cooks suggestions on how to use their products. Basic groceries, especially proteins and dairy remained hard to come by through The Depression and the second World War. Recipes like this one likely remained popular for a few decades before it was lost to all but the grandmothers thanks to box cake mixes taking off around the 1940s.

All of this made sense to me, but several searches revealed that versions of this cake are often called wacky or crazy, as in the Crazy Teenage Cake or simply Wacky Cake. It struck me as odd that such a silly name for a cake would stick -- and I'm not just referring to the community cookbooks. My best guess for this is that it has to do with the science behind the cake. It's a basic grade-school memory for most of us. When you combine baking soda and vinegar you get a fun, fizzy reaction that works well if you've built a replica volcano or are looking to power a rocket or vehicle with basic physics. The combination makes millions of gas bubbles that ooze and puff. Yes, fine volcano lava it does make, but it seems that it also does an amazing job of mimicking that aerated texture you might get from butter or shortening that has been whipped in a stand mixer until fluffy. You can even hear the experiment begin when you combine the wet and dry ingredients of this cake. It sounds like the fizz of a soda poured straight from a bottle.

Call it wacky, crazy or old fashioned, this cake is truly simple. It has a moist, fine crumb and true chocolate flavor, and, it really isn't that much harder than a box mix. You could keep it vegan with a simple dusting of powdered sugar, or do as I did and load it with some cream cheese icing. Either way, this is a recipe you won't mind keeping around, either.

The recipe follows in the previous post.

Crazy, wacky, old-fashioned choclate cake

This is the recipe I modified from several different sources. The major change I made was using half cake flour and half all-purpose. If you only have all-purpose flour on hand, simply use that. The cake flour adds a little more lightness but isn't enough to compromise the texture of the cake.

1 1/2 cups all-purpose flour
1 1/2 cups cake flour
2 cups sugar
1/2 cup unsweeted cocoa powder, sifted
2 teaspoons baking soda
1 teaspoon salt
2 cups hot water
3/4 cup vegetable oil
2 tablespoons distilled white vinegar
1 tablespoon vanilla extract

Preheat oven to 350 degrees. Prepare two 8-inch-round cake pans with a spray oil or two dozen muffin tins with paper liners.

Combine the dry ingredients in one bowl. In another bowl, combine the wet ingredients. Pour the wet ingredients into the dry mixture and, whisking by hand, stir to combine. A few lumps are expected. Pour the batter into your pans and bake for 35 to 40 minutes for round cake pans or 14 to 18 minutes for cupcakes. When the cakes are done, a toothpick inserted should come out clean.

Let cakes cool completely on a wire rack before icing or cutting.

Cream Cheese Frosting


2 8-ounce containers of cream cheese, softened to room temperature
1 stick of butter, softened to room temperature
3 cups of powdered sugar, sifted
1 tablespoon vanilla

Combine the cream cheese and butter in the bowl of a stand mixer, whipping until the two ingredients come together and are light and fluffy. Slowly add powdered sugar, about a cup at a time, making sure to start the mixer off on a slow speed and gradually increase so you don't kick the sugar out of the bowl. Finally, add vanilla and mix to combine. Spread or pipe frosting over cooled cakes or cupcakes.

14 September 2010

Cheap trick


It seems like at every holiday or special occasion in my family, there's a cheese ball. It usually starts with cream cheese and is served with Wheat Thins. My mom's version includes pineapples, pecans and bell peppers. My mother-in-law's mixes in powdered Ranch dressing and then the whole ball is rolled in cracked pepper. I love both of these and happily shove Wheat Thin after Wheat Thin smeared with cream cheesy goodness in my mouth at Christmastime.

I took this same dish and just dressed it up a touch, substituting goat cheese for the cream cheese and simply mixing it with a handful of finely chopped herbs. Then, I rolled the whole thing in those same, finely chopped herbs. I got the idea from a friend who said it was a Martha Stewart trick -- either making one large cheese ball or delicate, bite-size balls, perfect for smearing on a cracker or crostini.


It was super easy, fairly inexpensive and can be made ahead and makes the perfect appetizer for a crowd. And if you have any herbs in your garden, the only thing you'd need to pick up is the cheese. Any combination would do. I used fresh arugula, parsley, rosemary and sage -- heavy on the parsley. If you're shopping for herbs at the grocery store, parsley is a wise choice because it's so much cheaper than most other herbs there.

08 September 2010

When life gives you zucchinis


I've got a couple of housekeeping chores for this little blog to take care of, then I'll get to business with yet another muffin recipe. I swear, you'd think I made nothing else, but I promise this won't disappoint.

As most of you likely know, I'm pregnant. And, as these things go, I'm getting pregnant-er by the day. I am pleased as punch to take doctor's orders and slow things down a bit. Of course, Jasper's memo got lost in translation, so I'm still running after him. But as far as stresses I can control, I'm giving myself a bit of a break for the moment after one crazy August filled with parties, neighborhood picnics and hundreds of deviled eggs.

So I ask for your patience in the coming weeks and months as I try to keep up with my regular posts. The thing is that I truly love this blog, and just when I think no one reads it, I meet a random person who mentions it. So, thank you to those of you who've stuck with me. The problem is that when I give myself a deadline of posting every Monday, I start to get really stressed if I haven't cooked something delicious or stumbled across some new recipe by Sunday. It sounds silly, but anyone else who's got an on-going deadline (albeit self-imposed) knows what I'm talking about.

If you want to be sure to not miss a post, you can friend me on Facebook, where you'll see I provide a link there with each new post, or of course you can do the whole RSS-thingy, too. I will try, though, as much as possible to provide one new recipe a week.

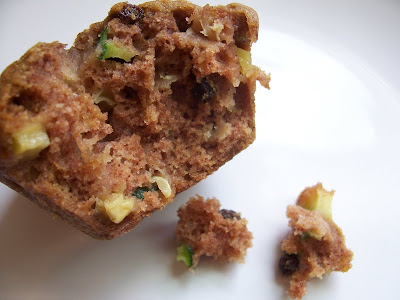
So about the muffins. I had been trying for weeks to come up with a good recipe for zucchini muffins. It sounded simple given that the summer squash is often turned into a sweet quick bread. But it turned out to be a bit more challenging than I thought. Sure, you could just take your quick bread recipe and pop it into muffin tins. I tried it, and just wasn't blown over by the flavor. Then I tried my basic muffin recipe and loaded it with shredded zucchini. It, too, wasn't bad, but it seemed a bit cakey, like the vegetable was crying out for something slightly more substantial, like the way a great carrot cake is delicate and hefty at the same time.

After spending way too much time thinking about these muffins, a very, very simple solution came to mind: I have a fantastic recipe for apple muffins. It's from Marion Cunningham's "The Breakfast Book." Excellent cooks will tell you that any Marion Cunningham recipe is a stand-up, solid recipe that can be trusted for all time. And let me just say in the world where it seems it doesn't take much more than a chipper smile or a dash of celebrity to get a cookbook contract these days, stand-up recipes seem to be harder and harder to find.


Apples and zucchini actually have a lot in common. Both will hold up to a nice, fine dice and then the moment they're cooked, release a ton of moisture. So swapping zucchini for the apples not only made sense, the recipe was so darn good, it would hold up to any number of substitutions. And the brilliant green-sided mini cubes in your muffin make for a pretty fantastic presentation.

So while our gardens continue to pump out zucchini, and our bellies are thinking there's no other use for it we haven't already tried, make these muffins. They freeze well after baking, so even if you're not baking for a crowd, it's well worth the effort.

I follow Cunningham's advice using three mixing bowls despite the fact that it creates more dishes to wash. I also use my hands to mix the batter as she advises. It's very stiff, and this seems to be the best way to get the ingredients well-mixed without overworking the batter.

Zucchini Muffins
Adapted from Marion Cunningham's Raw Apple Muffin recipe in "The Breakfast Book"

4 cups diced zucchini (peeled or unpeeled)
1 cup of sugar
2 eggs, slightly beaten
1/2 cup oil (corn oil is very good)
2 teaspoons vanilla extract
2 cups all-purpose flour
2 teaspoons baking soda
2 teaspoons cinnamon
1 teaspoon salt
1 cup raisins
1 cup broken walnuts

Preheat the oven to 325 degrees. Grease 16 muffin tins.
Put 3 mixing bowls on the counter. Mix the zucchini and sugar in one bowl and set aside. Put the eggs, oil and vanilla in a second bowl and stir to blend well. In the third bowl, put the flour, baking soda, cinnamon, and salt, and stir the mixture with a fork until blended.
Stir the egg mixture in to the apples and sugar, and mix thoroughly. Sprinkle the flour mixture over the zucchini mixture and mix well. (I use my hands because this is a stiff batter.) Sprinkle the raisins and walnuts over the batter and mix until they are evenly distributed. Spoon into the muffin tins.
Bake for about 25 minutes or until a straw comes out clean when inserted into the center of a muffin. Serve warm.

Variations: Substitute chocolate chips, currants or golden raisins for the raisins.

23 August 2010

Ready when you are

This week is a little slice of madness for me, and that's just the time when you need things in your fridge or pantry that are simply ready when you are.


Like pickled onions. Of course, this is nothing new, and excellent cooks have been filling their refrigerators with jars of the stuff for far longer than I've known how to boil pasta. The thing is, it's just not something home cooks do very often, despite the simplicity of it all.

Here's the rundown: Thinly slice onions. I like to use red onions and slice them on the mandolin, so I make quick work and get even, consistent slices. Stuff the onions into a glass jar or other non-reactive container. Then add vinegar to completely cover the onions. I like the combination of red wine vinegar and red onions. Cover, refrigerate and let cure for at least a day and up to a couple of weeks.


Check out this recipe for a great blend of spices to add. You can choose to simply do the vinegar and onions or play with your own spice mixture.

The best part is that once your onions are pickled, you can make any number of fantastic recipes. The onions turn a brilliant purple-pink color, and the taste is amazing. A bright, vivid punch of tang and slightly sweet. No harsh onion taste. Few other things bring so much color and flavor to finished dishes. Add them to salads -- everything from green to pasta to potato to rice salads. And don't forget sandwiches, humus plates, meat dishes and more. Take a couple of tablespoons of the brine, whisk together with equal parts olive oil and salt and pepper to taste. Instant salad dressing.


Go do this now. Tomorrow you'll thank the brilliant cooks who came up with this insanely simple technique.

16 August 2010

Easy does it


For the sake of my sanity, I need to work harder at my goal of simplicity. I've been just a bit overloaded lately, and I wasn't going to let a potluck side dish derail my weekend.

Corn on the cob would have to do. I love corn on the cob, and frankly, unless you're a 13-year-old with braces sitting at the lunch table with your boyfriend, I can't think of a reason anyone would dislike it.

I remember watching my Grandma Peach boil corn picked from her garden, and if you've ever had really fresh corn, you know that it is something to wait 10 months of the year for.

If you are fortunate enough to live in a city with a farmer's market, there's no better place to buy fresh corn. Look for ears with their husks still tightly wrapped with plump kernels that squirt a bit of juice when pierced. Shuck and cook the corn while the husks look lively and green.

I often slice my corn into halves or thirds, so you can quickly feed a good-size crowd with a dozen ears of corn. This recipe is certainly a quick, easy method, but I also like grilling corn on the cob or slicing the corn off the cob and sauteing in a hot pan with olive oil and salt.


Corn on the Cob with Chili-Spiced Butter


9 to 12 ears of corn, shucked and cut into thirds
1 tablespoon of sugar
1 tablespoon of salt, plus more to season to taste
1/2 cup butter, melted
Chili powder
Cracked black pepper
Ground coriander
Ground cumin
Cilantro for garnish

Fill a large pot with water about three-quarters full. Add the sugar and one tablespoon of salt to the water. Bring to a boil. Add corn to pot and continue to boil for about four minutes. Remove corn from water and place in a strainer over the sink. Work in batches if your pot isn't large enough to hold all of the corn.

While the corn drains and begins to cool, combine the butter and spices in a very large bowl. Start with a good handful of chili powder, adding more based on the flavor you'd like. Then add a dash each of coriander and cumin and several turns on your mill of black pepper. Season with salt to taste. With a fork or whisk, combine the butter and spices. Toss the corn in the butter mixture, using your hands to turn the corn to make sure each piece gets evenly coated. Transfer to a serving dish and garnish with cilantro. Serve immediately or refrigerate for service later at room temperature. Allow to stand on the counter for at least 20 minutes before serving.


Note: Recipe can be scaled up or down easily.

04 August 2010

A cool summer treat


About six years ago, I gave Seth an ice cream maker for his birthday. I didn't expect him to start making summertime desserts, but I thought the gesture was sweet because I could make him ice cream. He does help, taking the outdoor (or bath tub in the winter time) duty of packing the ice and rock salt and checking on the machine waiting for the gentle hum to turn to a slow whine when the ice cream is done.

Of course, they make quieter, more compact and less messy ice cream machines that do all that work just sitting on your kitchen counter. I don't mind packing the ice, it's the way my mom makes ice cream, so it always seemed to be the right way to me. Besides, hanging around outside watching the bucket sweat and a slow stream of salty water run away from the machine is part of the anticipation of the summertime treat.

Marionberries are an Oregon fruit similar to a blackberry.


Running the berry puree through a fine sieve will eliminate seeds from your ice cream. This step can be skipped if you don't mind the seeds.


Over the years I've tried several ice cream recipes. I tend to like fruit-flavors mostly, settling on a heavenly peach, blueberry, raspberry and just last weekend, marionberry. Some recipes have eggs, others don't. Some call for the eggs to remain raw, while others call for a slow heating, to make a custard. Those recipes are generally richer, and pretty darn delicious.

But sometimes you need a quick and low-pressure recipe. Folks, this is it. It doesn't get much simpler than this. The only downside I've found is that I don't think this recipe holds as well, meaning that a day or two after you make it, the texture just isn't quite as good as when it's fresh.
So, to remedy this, make it for a crowd, so you have nothing but an empty canister left when you're finished.

This recipe can easily be modified for any flavor profile, and because it's simply equal parts milk and cream, you can make as large or small a batch as you like.

Marionberry Ice Cream

2 cups heavy cream
2 cups whole milk
1 pint of marionberries (or any other type of ripe berry)
Approx. 3/4 cup sugar (baker's sugar is best but white sugar works)
Pinch of salt

Rinse and drain berries. Puree in a food processor or blender. To eliminate seeds, press berry puree through cheesecloth or a fine sieve. Add sugar to the puree by the 1/4 cup and whisking until sugar is dissolved (This will happen more quickly with the baker's sugar because of its finer granules). Taste as you add sugar as exact amount will depend on the sweetness of the berries. Combine the milk and cream in a bowl and add berry puree. Add a pinch of salt. Stir.

Pour mixture into ice cream machine and follow manufacturer's directions.

This ice cream could be eaten immediately as a very soft ice cream. Or transfer to a freezer-safe container and allow to set up for 4 to 6 hours.

29 July 2010

Neighborly thanks

My mom called me yesterday and said that since I hadn't updated my blog, she just wanted to make sure everything was OK.

Yep, everything is just fine. We're just easing back into our routine after a week on the road in Oklahoma visiting family. We had a great time seeing babies, cousins, parents, grandparents, siblings, aunts, uncles and, of course, that flat landscape dotted with oak trees and oil pumpers.

While we were away, we needed someone to check in on our chickens. Our three hens just started laying eggs a few weeks ago, so while they don't need their feed and water refilled every day, we did need someone to collect eggs. Our neighbors Mike and Diane offered to help, and I readily accepted. While they don't have chickens, they hardly think it's a novelty raising hens. They've lived on a farm, grew up with livestock and have children whose own hens provide most of the eggs they eat. They live in a house that's been in their family for more than 60 years, and they keep close tabs on what goes on in our little corner of the world.

Just before leaving and upon returning, we visited them several times, and Jasper was introduced to their fish aquarium and allowed to play with dolls in their living room. These grandparents know how to treat a little boy, and Jasper's no dummy when it comes to people doting on him. The last time we stopped by, he walked in like he owned the place.

As a thank you, I baked them a loaf of Whole Wheat and Molasses Quick Bread. It's from Mark Bittman, also known as The Minimalist, cookbook author and New York Times columnists. His recipes are always great, and I was introduced to this one by my friend Erin.

This bread is a cousin to that beer bread I love in that it is so easy to make that you think surely you must be missing a step. The molasses gives this bread a subtle sweetness, and the whole wheat flour and corn meal make it a dense loaf, perfect for thick slices.

Erin brought some to my house for dinner recently, and I toasted the leftovers the next morning. While I loved the bread the night before with just a smidge of butter, it was even better warmed with melting butter and a spread of raspberry jam made the week before by my neighbor Mike.

The Minimalist's Quick Whole Wheat and Molasses Bread
By Mark Bittman

TOTAL TIME
1 hour 15 minutes

Ingredients
* Oil or butter for greasing pan
* 1 2/3 cups buttermilk or plain yogurt, or 1 1/2 cups milk and 2
tablespoons white vinegar (see Step 2)
* 2 1/2 cups (about 12 ounces) whole wheat flour
* 1/2 cup cornmeal
* 1 teaspoon salt
* 1 teaspoon baking soda
* 1/2 cup molasses

Preparation

1. Heat oven to 325 degrees. Grease an 8-by-4-inch or 9-by 5-inch
loaf pan, preferably nonstick.
2. If using buttermilk or yogurt, ignore this step. Make soured milk:
warm milk gently -- 1 minute in the microwave is sufficient, just
enough to take the chill off -- and add vinegar. Set aside.
3. Mix together dry ingredients. Stir molasses into buttermilk,
yogurt or soured milk. Stir liquid into dry ingredients (just enough
to combine) then pour into loaf pan. Bake until firm and a toothpick
inserted into center comes out clean, 45 minutes to 1 hour. Cool on a
rack for 15 minutes before removing from pan.

YIELD
1 loaf

NOTE
Lighter Whole Wheat Quick Bread: Use 11/2 cups whole wheat and
11/2 cups all-purpose flour; omit cornmeal. Substitute honey for
molasses. Beat 1 egg into wet ingredients in Step 3. Proceed with
recipe.

12 July 2010

The heat is on


Rice Salad with Mango & Avocado. Combine cooked white rice with cubed mango, avocado, thinly sliced red onion, green onion, salt, pepper, and a vinaigrette made of olive oil and red wine vinegar and a pinch of sugar. Serve cold.

Growing up, I don't ever recall the heat of an Oklahoma summer dictating too much of my life. It's possible that it did, and I just don't remember such things because I was too caught up the joys of summer.

When I was in elementary school, I remember thinking how amazing it would be if we had a Slip 'n' Slide, but somehow I still had a ton of fun running the neighborhood with Teddy, Talia, and, sometimes, my older sister's friends. I spent my middle school summers hanging with my BFFs Jenny and Lisa. We camped in Jenny's back pasture, stuffed Cheez Balls in our mouths until we could no longer laugh and took a few middle-of-the-night walks to meet up with boys. In high school I put my swimsuit on and mowed the yard, went fishing with my boyfriend and took the kids I babysat to the pool. Life, I'd say, was pretty good, not to mention air conditioned.

The climate in the Northwest is generally mild, so complaining about the heat seems silly. There's not much humidity, and even when the days warm up, the nights typically cool everything back down. That's why it seems unreasonable to have central air installed in our 100-year-old home. So, we install window units in the bedrooms to run just while we sleep. And the rest of the day, we spend rotating from one level of our home to the next, searching for the coolest spot. Sometimes it's cooler outside than inside, and sometimes you simply can't get an ounce of relief.


Watermelon Lemonade: Combine one quarter of a medium watermelon, in chunks, with a half gallon of lemonade. Puree in a blender or directly in the serving pitcher with an immersion blender. Strain through a cheesecloth or sieve if you want the pulp removed. Serve over ice.

That's how I felt last week, when, for three days in a row, the temperature climbed above 90 degrees. Yes, I know. I feel ashamed of my Plains State roots, complaining about a summer day in the 90s. But the thing you don't know, and couldn't know unless you lived it, is that when the nights don't cool off enough to really drop the temperature in your house, it begins to get like an oven, just slowly rising hotter and hotter each day. This is fine if you dart off to sit in an air-conditioned office all day, but we're just here. At home, in the heat. When the thermometer inside your house reads 80 degrees at 7:30 a.m., it's going to be bad.

So, hot, and pregnant, I went about my days last week keeping the heat in mind with everything from the clothes I put on to the way I'd do my hair (or not, as it turns out when I don't blow dry it) to the meals I'd make.

We ate rice salads, quinoa salads and pasta salads for dinner. I made no-bake cookies for our afternoon snacks, and, looking for a way to finally finished off a huge watermelon, I made watermelon lemonade to slurp through a straw while I watched Jasper play in the kiddie pool.

I'm fairly certain we haven't seen the last of the heat, and I am sure to be even more pregnant when the next heat wave strikes. I'll put another ban on using the oven. My opinions about the usefulness of bras will change, and I may even have to pull out the swimsuit (heaven help us all). But if I can find a shady spot to drink some watermelon lemonade and fill the pool for the boy, things will all right, heat and all.

06 July 2010

Semi-Homemade


About this time last week, I was wasting some time on the computer when I remembered I was to take a dessert for four to a girlfriend's house that evening. I finally had my energy back after a miserable cold, but I just didn't feel like a baking spree.

I was, however, willing to drive to the grocery store to pick up a few things, and that's just what I did. I feel a little like Sandra Lee and her Semi-Homemade shtick telling you this, but I'll go ahead anyways.

I remembered I had some whipping cream in the fridge that needed to be put to use. And with beautiful strawberries and raspberries in season, I figured I needed to find a use for the ruby jewels. And lastly, I had to consider my hostess, who is not big on chocolate.


Somehow, I came up with trifle, that English dessert that's layers of cake and cream packed into a bowl. It's such a special dessert, there's literally a dish named after it, a trifle bowl, of which I do not own. And therein came problem no. 2.

Although my hair is not nearly as blond nor coiffed as Sandra's, and I seldom pose for photos with a piping bag in my hand, I thought of nothing but her as I shoved cubes of angel food cake into wine glasses. It really was perfect, really, given that I wasn't so much as making trifle, I was just borrowing it's layered presentation. I suppose you could make yours a bit more trifle-like by soaking your cake in some brandy or rum if you weren't already running late to your dinner party.


The most refreshing part of this dessert was that it didn't take long for my daydream of Sandra's test kitchen to burst. Once I said the word "cake," Jasper pulled a stool up and thought I'd finally gotten it right by serving bite-size pieces of cake. As the boy tried to ask for more with his mouth stuffed, crumbs flying everywhere and sticky little fingers all over the counter, I realized that this is exactly the kind of moment that would give Sandra's world a real homemade touch!

Individual Raspberry Trifles

1 angel food cake, cut into 1-inch cubes
1 8 oz package of cream cheese, room temperature
1 1/2 cups whipping cream
2 to 3 cups of raspberries, divided
1/2 cup + sugar
Zest of one lemon
Mint leaves for garnish

Puree one cup of raspberries and set aside. In a stand mixer, whip the whipping cream until it develops soft peaks. Transfer to another bowl and place in the refrigerator. With a whisk attachment, whip the cream cheese and sugar in the stand mixer until light and fluffy. Add raspberry puree and lemon zest and whip until well blended and smooth. Remove the mixing bowl from the stand and fold in, by hand, the whip cream to the cream cheese mixture. Set aside.

In wine glasses, make a layer of angel food cake cubes, then top with a layer of the whipping cream. Then, arrange a few whole berries near the outside of the glass, so they are visible. Then repeat steps of layering cake and cream filling until the glass is full. Top with more of the whipping cream and a raspberry and mint leaf for garnish.

Transport tip: I had to carry these glasses to my friend's house, and couldn't quite figure out how to make it work until I remembered I still had the box my wine glasses came in. I just popped the filled glassed in the box and didn't worry a bit about them traveling in the car.

30 June 2010

Grab a fork, it's gonna get messy


Over the weekend when I thought for a moment I was feeling well again, I got a craving for these delicious rolls I had a few weeks ago. I had them at a friend's potluck dinner on a warm, sunny afternoon with kids buzzing everywhere. A neighbor, Heather, walked through the front door, apron still on, oven mits on her hands and set down a fresh-from-the-oven casserole dish of the most beautiful rolls I'd ever seen.

I asked if they were cinnamon roles, and she laughed saying that cinnamon was just too overdone. These rolls, she said, were lemon ginger.

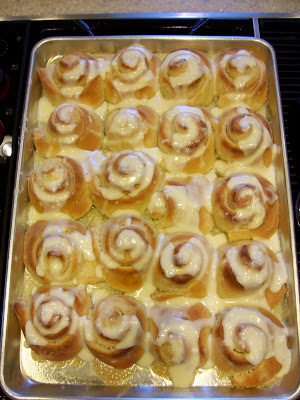
This is the point where I really shouldn't have to write anything else. Sticky Lemon Ginger Rolls, as she called them, were enough to draw you in, just by name alone. I asked for the recipe multiple times, wanting to make clear it wasn't a polite, "Oh, I'd love this recipe," but a sincere, "Give me this recipe. NOW!"

I have to admit I was slightly intimidated by the recipe at first. It seemed so lengthy that it must be complicated. I was pleasantly surprised: No bit of it was too difficult. There were three major steps involved and some time to kill, but I somehow managed to squeeze it in between episodes of "Curb Your Enthusiasm" via Netflix, so, it's doable. I made the rolls the night before and let them hang out in the refrigerator until morning. I highly recommend this because not only will it yield you a fantastic breakfast with little work the morning of, but breaking up the work made it seem less intimidating.


This recipe does call for making your own candied ginger. It isn't hard, just combining water, sugar and sliced ginger over a little heat. I found this recipe was a reliable one. I did this several days in advance, popped the ginger (not coated in sugar) and its juice in a jar and kept it in the fridge. It's not bad to have on hand and can be added to a number of recipes such as muffins and pancakes.

My crack at this recipe yielded 20 rolls that were roughly three inches wide. I froze a few immediately after they cooled, and after a quick defrost in the microwave, they were equally delicious.


This recipe is without a doubt a keeper. Write it down, print it out, whatever you've got to do. And the dough for these rolls would work for any number of recipes -- cinnamon, if it's not too overdone for you, berries, cherries, dried fruits, nuts, whatever you can think of. Heather said she was thinking of a lime cherry combination. Let me just say, I hope I'm nearby again when those come out of her kitchen!

Sticky Lemon Ginger Rolls
By Heather Lehman

Dough

2 1/2 tsp yeast

3/4 cup milk (warmed to 100 degrees or so, but not too hot)
1 stick butter - very soft (microwave if you have to, but left out to soften is better)
1/4 heaping cup white sugar

1 1/2 tbsp vanilla
1/2 to 1 tsp salt

1 tsp nutmeg

2 eggs

zest of 2 large lemons

4 1/2 cups flour at the ready (you may or may not use all of it)

sticky filling

2 cups white sugar
juice of 2 large lemons and zest of 2 more large lemons
1 1/2 cups candied ginger (see recipe link below)

½ packet, or 4 ounces, cream cheese

4 tbsp soft butter

Glaze:
1packet cream cheese, softened
Juice of 1 large lemon and zest of 1 large lemon – or more

1 to 2 cups powdered sugar

Prep:

Put yeast in a large bowl and stir in warmed milk. Let rest for a little while. Stir in soft butter, sugar, vanilla and one cup of flour. Mix in salt, nutmeg, and lemon zest. Mix in eggs and second cup of flour until all flour is combined into sticky, soft dough. Add 2 cups of flour and knead dough until pliable and stretchy – if dough remains too tacky, add remainder ½ cup of flour. Kneading should take 5 to 7 minutes – don't overwork this dough!

Rub down bowl with vegetable oil and lightly coat the dough ball with oil. Cover bowl with plastic bag and towel and let rise until doubled (roughly 1 hour). This dough is fairly forgiving and you can start in on the rolling after 40 minutes but don't let it sit longer than 1 ½ hours.


While dough is rising make the filling. Mix sugar, nutmeg, ginger in a bowl or food processor. Mix in juice of one lemon until mixture is like wet sand. Add cream cheese until mixture is uniform but still grainy. If you don't use a processor, really make sure your ginger is fairly finely chopped.
Lightly butter baking dishes. Two mid-size baking dishes would work or one standard sheet tray or cookie sheet with a rim.

Lightly knead the risen dough and divide into two equal pieces. Turn out one piece on a floured surface and lightly roll out into a rectangle of about ¼ to ½ inch thick. Rub down the dough with ½ of the softened butter (2 tbsp) and then rub the dough with ½ of the sticky filling. Starting at the long side, tightly roll up the dough into a tube. Cut tube into slices - no more than 2 inches per slice - and set them on buttered baking dish or tray so that they are close but not touching one another. Repeat with second half of dough and butter and filling.

At this point you can refrigerate the rolls for later use by covering tightly with wrap. They will stay good for at least 24 hours. Otherwise, lightly cover and let rise for at least an hour – they will double in size which is why you don't want to pack them in too tight after slicing.
While rising, heat oven to 350 degrees and place risen rolls on mid rack for 30 to 35 minutes. It is very useful to have a thermometer read on these rolls – when they hit a center temperature of 190 degrees they are good to pull out of oven.

Mix all glaze ingredients together – should be pourable mixture but not too thin. I prefer a lot of glaze, but you may not. For less glaze, use the 1 cup powdered sugar and juice of 1 lemon. For more, use more lemon juice and powdered sugar but not more cream cheese.

Candied ginger recipe by David Lebovitz.

23 June 2010

Patience, please

Toward the end of last week my little guy got really sick, and, just as he began to get his color and energy back, I caught it.

So, between wiping his nose and mine, I haven't had much time to spend in the kitchen. OK, I take that back, I've still been cooking for the family, but let's just say I don't have the time, energy or sense of taste to make anything worth repeating.

I hope to be back in the kitchen soon, and plan to have a post ready early next week. Thanks for your patience, and just be glad you're reading this in the privacy of your own home or cubicle, far, far away from my germ-infested little house.

16 June 2010

This, that and a side of slaw


Before I forget, I wanted to pass along a couple of tips I've been meaning to share with you. As I'm sure many of you do, when I find a dish I like, I tend to make it a few times. And when I find one I love, I make it a lot!

I just love those Banana Chocolate Chip muffins, and last Saturday seemed like the perfect morning for them. We were all headed out of the house early to get to the biggest parade in Portland, The Grand Floral Parade. Seth rode on a bike-powered float, and the Jasper and I joined a few friends to watch the marching bands, horses and floats rolls by. It was fun, surprisingly sunny and warm, and an overall good time. But what I want to tell you was this:
  • I replaced one cup of all-purpose flour in this recipe with whole wheat pastry flour. I actually liked the texture a little better than the two cups of all purpose. I should also mention that I added two ripe bananas that were pulled from the freezer and thawed. That meant they were very juicy. I absolutely think the added moisture helped.
The second thing I wanted to tell you has to do with Dina's delicious beer bread, another recipe I've played with a lot in the past few months.
  • Again, I have substituted half of the all-purpose flour, but in this recipe, I used regular whole wheat flour. The results seemed equally tasty.
  • Also, I usually bake this in one large loaf pan. I tried dividing it up into two smaller loaf pans and freezing one after it cooled. This worked just fine. I do have to say that I like the larger slices, but that, of course, has nothing to do with taste. If you want quick, handy slices, slice after cooled and freeze sliced loaf. Then, pull one out at a time, and pop it in the toaster. Yum.
  • I cubed some of this yummy bread and made croutons with them. These were so good floating in a tomato-based soup. Needless to say, don't throw out the stale beer bread. Here's a crouton how-to.
As for a new recipe, I'll share one that was just a little something I pulled together on a whim to take to a neighborhood potluck. I called it Strawberry Coleslaw. It, like any good salad, made the best of limited quantities of a lot of ingredients. Coleslaw is very simple, and cheap for the budget-weary, to prepare, even for a crowd.


Here's how it was prepared. Get creative with your own version and add whatever fruits or veggies you have on hand.

I tossed together:
One head of green cabbage, shredded or thinly sliced
A couple of carrots, grated
An apple, grated
A mango, grated
A handful of strawberries, sliced


Then I mixed in a small bowl:
About 1/4 cup mayo
About 1/4 apple cider vinegar
Salt and pepper
About a cup of strawberries, pureed (I just plopped the whole berries in my dressing and used the immersion blender)
Enough sugar to balance out the sweetness (add by the teaspoon and taste)

Then combine the cabbage mixture with the dressing and allow to sit at least an hour before serving. Top with a few additional sliced strawberries.

* Many coleslaw recipes call for the cabbage to be soaked in salt water and thoroughly drained before preparing. This step helps keep the cabbage crisp if it will be held for a long period of time. I usually skip this step because I can't plan far enough ahead to do it.

09 June 2010

Snack a no-go, dinner a go-go

I wanted to tell you all about this wonderful little cracker that I'd made in fun animal shapes for Jasper. I wanted to tell you they were made with whole wheat flour and freshly grated cheddar cheese. I thought they were tasty, but when offered to Jasper, he asked for "fishies." It seems that damn Goldfish Cracker won't be leaving my pantry too soon.


Aren't they cute? But, since they aren't kid-tested, I'll have to look for another recipe before I pass one along. So now I'm going to to tell you a couple of dinner stories in pictures this week.

The first is an entree salad, a term that elicits a perplexed look on Seth's face, not out of disgust but sheer confusion. "It means we're having salad for dinner," I'll say. On a rare late spring Saturday, we had some sunshine around here, so we headed to the farmer's market for some goodies, which inspired the salad. I topped it with some broiled fish, which, in my book, elevates it from a first course to a main. A simple dressing of oil and vinegar did the job.

1) Tore lettuce greens and sliced radishes, carrots and kolrabi on the mandolin slicer


2) Sauteed canned chick peas (rinsed and drained) in olive oil until they turn a deeper, golden color. Add a liberal dose of salt.


3) Broil fish (no, that's not fish in the picture) with just a little drizzle of oil and well-seasoned with salt and pepper. Remove fish when done and turn the oven off. Then toss pita in the oven to warm (mine was actually frozen, and this thawed and lightly toasted it, yum).

4) Combine the veggies, chick peas and dressing, top with fish and serve with bread.

This second meal was also inspired by the farmer's market and a huge bundle of fresh asparagus. I'd wanted to make pesto with it for a while and have just been waiting for the season. I thought Jasper might go for it since I paired it with his favorite meal of pasta. He still wasn't overcome with excitement, but it may be the only bite of asparagus I'll get in the little guy this year. I really liked this pesto, and although pesto is hardly a new dish, I hadn't had asparagus pesto before.


1) Trim asparagus by grabbing each end with one hand and forcing it to break where it may. This is the best way to get rid of all of the tough end, which could ruin this dish. Toss with olive oil, salt and pepper. Roast in a 375 degree oven until very tender and slightly paler in color. Cool completely. Combine asparagus, a couple of tablespoons of grated parmesan, a couple of tablespoons of toasted pine nuts, an herb if you'd like and olive oil in the bowl of a food processor. Whiz. Add more oil as needed to achieve a spreadable paste. Season with salt and pepper to taste.

2) Toss with pasta of your choice. Mine was frozen cheese tortellini. I used the leftover pesto on a pizza the next day. Yum, too.

31 May 2010

A timeless casserole

We all have those go-to meals. They're easy, typically cobbled together with a few pantry staples and an overwhelming number of these are one-dish meals.

Luckily, one of the reasons most of these meals get stuck in our weeknight rotation is that the family loves them. And the cook, well, she can't complain when a meal hits that many high notes.


My standby meal, always waiting in the wings, is tuna casserole. I realized recently that despite mentioning it several times before, I've never shared the recipe. That's in part because I was never given a recipe. I grew up watching my mom make it. She would use a red, heavy-bottomed sauce pan for the sauce, that, when spotted on the stove top, almost always meant tuna casserole.

It's actually a fairly simple dish. It's a cheese sauce mixed with elbow noodles and canned tuna. It was always served with Saltine crackers at my mom's table, and leftovers never sat in the fridge too long. I remember one time sitting at the table in my Great Grandma Peach's kitchen next to my Grandma Pat. My mom and her grandmother were near the sink, and they were talking food. My Grandma Pat mentioned that she didn't care for tuna casserole but she made it regularly for her kids growing up. She also said she topped it crushed potato chips. The potato chips bit started the wheels turning in my head, but frankly, before that moment, it never occurred to me that the dish was something my mother took from her own.


Like my mom must have done with me, I often keep Jasper entertained while I cook by letting him pull up a stool and watch. When I make tuna casserole, he seems to be in heaven. He gobbles up the cheese nearly as quick as I grate it, and he loves the little bowl of flour I give him while I make my roux. And, like I remember doing as a kid, he wants to try the dried, uncooked pasta.

I don't vary from this recipe. In fact I got a little over-passionate about it while making it at a restaurant when someone suggested I add mushrooms or peas. I won't, however, think ill of you if you want to tweak the recipe. After all, my mom never put potato chips on hers.

Tuna Casserole
3 tablespoons butter
3 tablespoons flour
1 and 3/4 cup milk, slightly warm
1 cup shredded cheddar cheese, plus more for topping
1 can tuna, drained and flaked
Short-cut dried pasta, cooked to package directions*
Salt and pepper to taste

4 Saltine crackers, crushed


Preheat oven to 350 degrees. Melt the butter in a sauce pan over medium heat. Once the butter melts and bubbles begin to disapate, add flour slowly while stirring. Continue to stir while butter and flour mixture cooks, until the mixture looses the raw flour smell, about 3 to 4 minutes. Slowly add the warm milk while whisking continuously. Once milk has been added, whisk every once in a while while it comes to a slow bubble. Begin to reduce heat, continuing to stir. The sauce should begin to thicken. Add shredded cheese and stir until melted. Add salt and pepper to taste. Add tuna and stir to combine. Pour sauce over pasta and stir to coat pasta with sauce. Pour pasta into casserole dish. Top with more shredded cheese and then sprinkle the crushed crackers on top. Bake until cheese topping is slightly browned. Can be prepared ahead, cooled and refrigerated and baked later. Allow for longer baking time.

* I typically use the small elbow pasta, but any pasta that would cup sauce would work. Elbow, shells, and penne probably work best. I typically use a round casserole that is about 9 inches in diameter and four inches deep. A 9 by 13-inch also works well. I fill the casserole with the dried pasta until the casserole is about 1/2 to 3/4 full to know how much pasta you'll need. I find that works better than measuring cups since different pasta shapes fill the casserole differently.