27 April 2010

Greta done good

Is it rude or boastful to say the dessert you brought to a dinner party was delicious? Sue me. It was.


When I was in middle school and high school I spent a lot of time with one of my best friends, Lisa. Her neighbor Marianne was a sweet woman who, at the time, didn't have a family of her own, so she adopted Lisa's. They had dinners, holidays and birthdays together. So, naturally, I saw a lot of her, too. She was a good cook and seemed to enjoy hosting dinners, and she was never shy about saying she enjoyed her own food. She just was a bit more lady-like about it.

"Greta done good," she'd say, and we'd all laugh, knowing she was talking about herself. I don't know where the name Greta came from or how the ritual got started, but it was genius. It made it OK for her to be the first one to say her casserole was superb.


Over the years, I adopted her saying for myself. Not that I'm shy about my cooking in front of my family, but I love the memory of sitting around Marianne's dining table and hearing her laugh after she'd praise Greta's work.

Go make this cake. It's simple but a little labor intensive separating 10 egg whites, but once you taste it, you'll take no shame in telling everyone how great your cake is. And should you feel the slightest twinge of guilt, just say, "Greta done good."

This is what the cake batter looks like after folding in the flour.

This cake recipe was published in the April issue of Bon Appetit as a Lime Angel Food Cake with Lime Glaze and Pistachios. I wanted to bring strawberries into my dessert, so I swapped lime zest for lemon, skipped the glaze and topped mine with whipped cream and macerated strawberries. Whether you go for lime and nuts or lemon and berries, this recipe is a winner.

Lemon Angel Food Cake


1 cup cake flour
(I used Softasilk)
1 1/2 cups superfine sugar, divided

1/4 teaspoon salt

10 large egg whites, room temperature
*
2 teaspoons lemon zest

1 teaspoon vanilla extract

1 teaspoon cream of tartar


Equipment: 10-inch diameter angel food cake pan with 4 inch sides.**

  • Position rack in center of oven and preheat to 350°F. Sift flour, 1/2 cup superfine sugar, and salt into medium bowl; repeat sifting 3 times. Using electric mixer, beat egg whites, lemon peel, and vanilla on medium speed in large bowl until frothy (mixture may turn neon green but color will change when remaining ingredients are added). Add cream of tartar; increase speed to high and beat until soft peaks form. Gradually add remaining 1 cup sugar, 2 tablespoons at a time, beating until stiff peaks form. Sprinkle 1/3 of flour mixture over whites and gently fold in until incorporated. Fold in remaining flour mixture in 2 more additions just until incorporated. Transfer to ungreased 10-inch angel food cake pan with 4-inch-high sides and removable bottom (do not use nonstick pan); smooth top.
  • Bake cake until pale golden and tester inserted near center comes out clean, about 38 minutes. Immediately invert cake onto work surface if pan has feet, or invert center tube of pan onto neck of bottle or metal funnel and cool cake completely.
  • Using long thin knife, cut around cake sides and center tube to loosen. Lift out center tube with cake still attached; run knife between cake and bottom of pan to loosen. Invert cake onto rack, then turn cake over, rounded side up. Set rack with cake atop rimmed baking sheet.
Topping
  • Slice one pound strawberries vertically and gently toss with about three to four tablespoons of sugar. Let stand at room temperature for at least 30 minutes before serving. Refrigerate for longer holding.
  • Pour 1/2 cup whipping cream into the chilled bowl of a stand mixer. Add one teaspoon of vanilla and one tablespoon of superfine sugar. Mix on high until soft peaks form. Taste and more sugar if needed for desired sweetness.


* When separating egg whites, do yourself a favor and set up a station like this: one bowl or container for the yolks. One custard or measuring cup for whites. The mixing bowl and another bowl for egg shells. Crack one egg at a time, pouring it directly into your hand. Let the whites run off into the custard cup. Toss the yolk into the yolk bowl. Pour the egg white into the large mixing bowl. Repeat until complete. By cracking the eggs into a small cup instead of the large bowl, you won't ruin the entire batch if you break a yolk!

** It's important NOT to use a non-stick pan. You won't be able to cool it upside down otherwise. I found my inexpensive aluminum pan at Goodwill for $2.99.

19 April 2010

Nice rice

We've been eating a lot of rice around our house lately. We eat it as a side dish, stir fry it with veggies and call it a main dish, top it with a friend egg for breakfast or sprinkle it with sugar for a sweet treat.

That's why I was so happy when I made a lemon rice dish last week that I could have eaten in one setting. This wouldn't be so bad except I'd made a huge portion to take to a pot luck. I got the idea after reading a recipe in Bon Appetit. There was nothing wrong with their recipe, but I just didn't have all of the ingredients around. So, I made do with what I had, and that was more than enough.


The next day, I went to another pot luck party, with a surprisingly similar guest list, and one of my neighbors commented on the rice I'd brought the night before. He said he loved the vibrant green color the avocados gave it. I tend to agree. It was tasty, but it was pretty beautiful, too.


Lemon Avocado Rice
(this makes a pretty large portion, but it could easily be halved)

2 1/2 cups long-grain white rice, rinsed
4 1/2 cups water for cooking rice
2 large lemons
4 avocados
1 1/2 cup fresh or thawed frozen corn
Olive oil
Salt & Pepper
1 bunch cilantro

Bring salted water to a boil and add rice. Cover and reduce heat. Cook until just tender, about 15 minutes. Spread rice out onto a baking sheet for quick cooling. While rice is cooling, zest and juice the lemons. Using about 3/4 of the lemon juice, make a dressing with the juice, oil, salt, pepper and zest. The ratio should be about one and half parts oil to one part juice. Set aside. Dice avocados and toss in the remaining lemon juice. Roughly chop a handful or two of cilantro. Add dressing to room temperature rice and stir to coat evening. Add avocados, corn and cilantro and toss, being sure not to smash the tender avocados. Season to taste. Serve immediately or cover and refrigerate.

12 April 2010

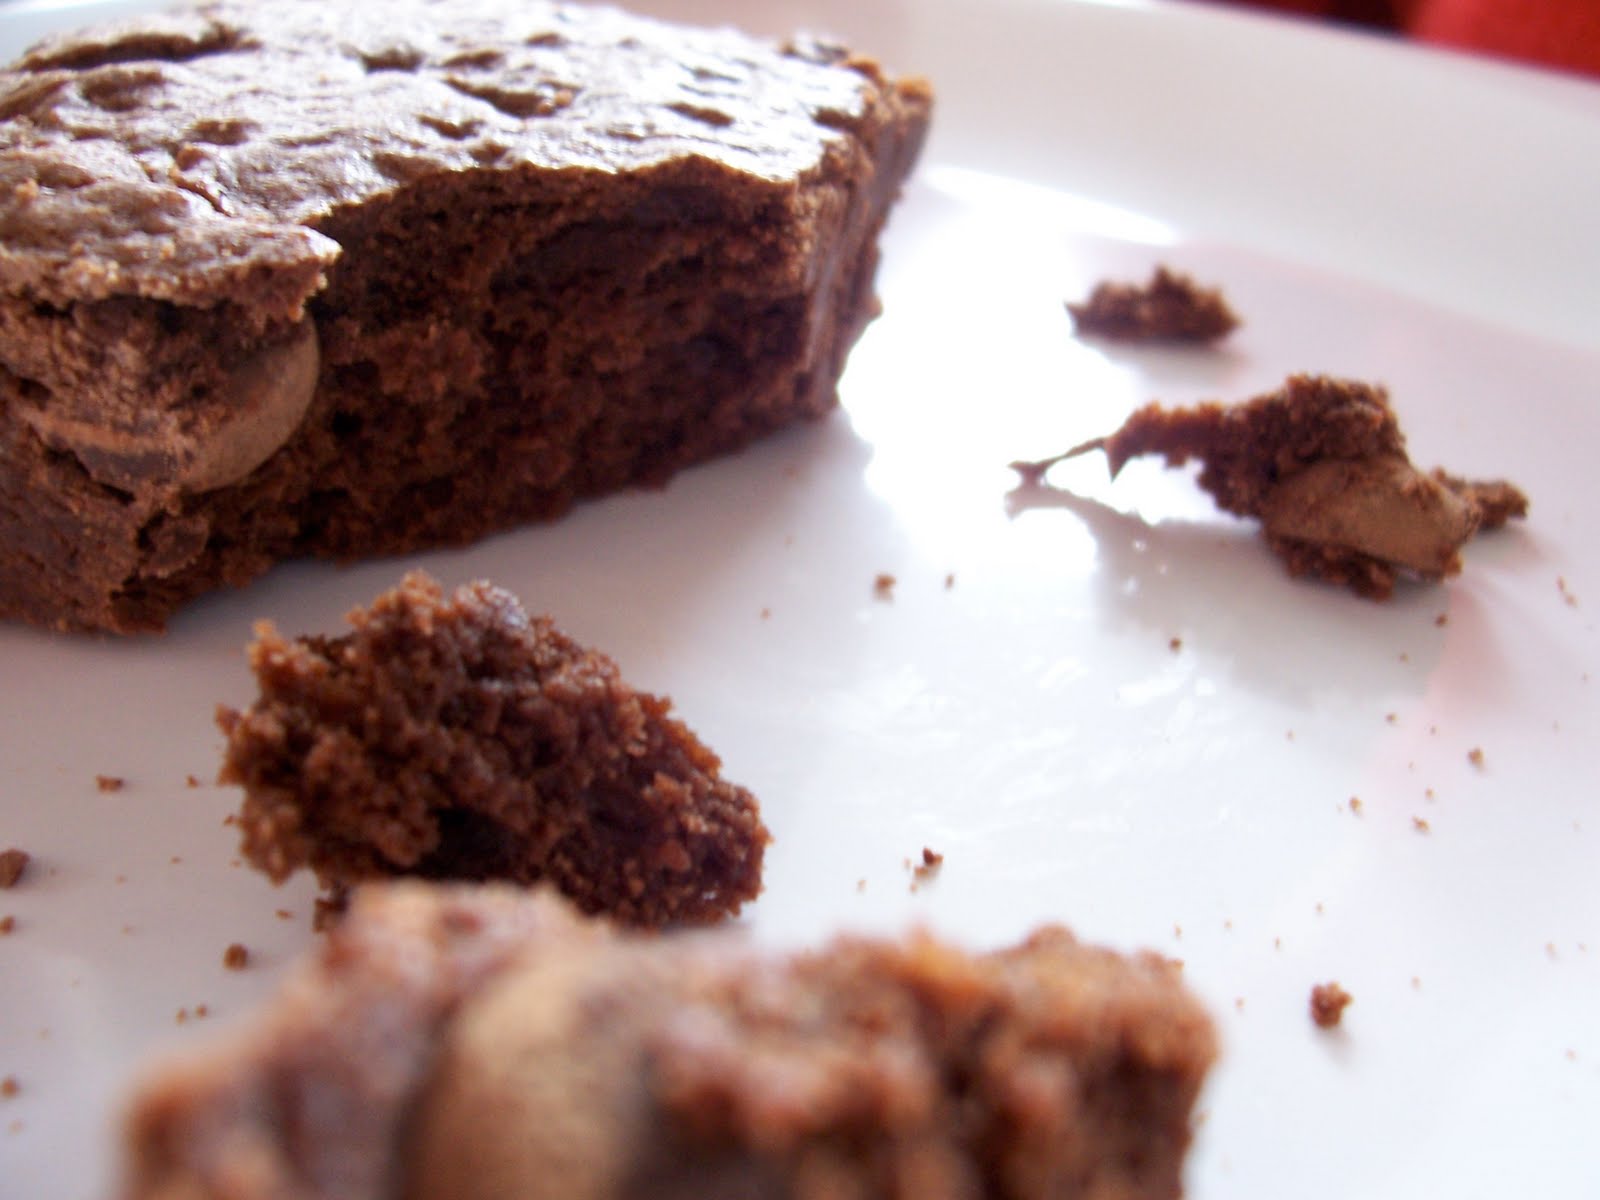
Brownie Therapy

I've been on a bit of a brownie binge around here, making three recipes in two weeks in hopes of settling on the perfect homemade brownie.

While my family didn't argue with the ongoing brownie train, more than once I thought to myself that the box version isn't really that bad. I made brownies that were too rich and some that weren't rich enough. I settled on recipe I adapted from "Endangered Recipes."


But after all of this fuss, I remembered my friend Brian's famed brownies that show up at parties full of drinking journalists and end-of-summer barbecues.

I asked him to tell me about his brownies, and I was a little surprised to find that our recipes were very similar.

He told me his mother wasn't much of a cook, and a lot of the chores got passed on to the kids. He was the youngest and desserts were his duty. His brownie recipe started with the basics, and he just kept tinkering until he got it right. Perhaps without some lofty expectations, like an expert baker for a mother, Brian felt free to flub a few times before he got it right.

What Brian feels when he makes his brownies, is what we should feel when we cook and bake. He calls it therapeutic. Cooking and baking feeds more than your family. It is as vital as breathing but as beautiful, technical and creative as a fine work of art.

"That part of the recipe where you stir the sugar into the butter and chocolate, I just keep stirring and stirring and stirring," Brian says. "It looks so beautiful, all silky, that rich color, and whether it's true or not, I have come to believe that the lengthy stirring at that point is one of the keys to good brownies."


I agree. Making the brownies did a little something for my soul. Plus, a little taste of brownie batter, and your entire day starts looking up. Brian insists on mixing his batter by hand, while I went for the mixer. And my recipe had only two eggs, but his three produce a richer brownie. Be sure to read his note about allowing them to set up. If you like a little less goo, try the two-egg method. My recipe also called for just one cup of sugar, but I did add a few sweetened chocolate chips in along with my chocolate squares. I think either method produces the right amount of sweetness.


Because the recipes were so similar, I'll give you Brian's. It's a homage to everyone who had a mother who didn't teach them to cook. Sometimes, something even better surfaces when we're forced to make it up ourselves.

Brian's Brownies

4 squares unsweetened chocolate
1 1/2 tablespoons butter
1 1/2 cups sugar
1 teaspoon of vanilla (Or rum or brandy or any other flavor you want.)
3 eggs
1 cup of all-purpose flour
Half a bag of chocolate chips (Mini, regular, bittersweet, whatever angle you want to go.)

Melt the butter and chocolate together over low heat, careful not to burn the chocolate. Add in the sugar and stir until the mixture is really smooth. Remove from heat. Add the vanilla and stir. Transfer the mixture to another bowl and slowly mix in one egg at a time by hand. Add the flour and blend by hand. Add the chocolate chips. Pour into a greased 9-by-13 glass dish. Bake at 350 degrees for 32 minutes. If your oven runs at all hot, reduce it to 335 degrees or so.

The brownies come out mushy. You can't eat them right away. Let them set, either at room temp or in the fridge. I usually wait at least half a day before serving them.

05 April 2010

A fresh potato salad

I can wait until June for blueberries. And July for fresh melon. Even August for fresh corn. But having to wait until summer for potato salad just seems a little crazy.

I was in the mood for potato salad the other day, but I had more than a few restrictions. First, I was feeling a bit lazy, so it couldn't be too difficult, and second, I wasn't ready for a mayo hangover, so I needed something a bit lighter.

Without really thinking about it, I grabbed a few things from the fridge and cranked the oven. I decided to roast the potatoes instead of boiling them. It was easier; I didn't have to babysit something on the stove. Then I married a thinly sliced onion, the juice of a lemon and a splash of vinegar. By the time the potatoes were done, my onions were perfectly limp. Mix them with some chopped parsley and yogurt and ta-da -- a light, fresh dressing that isn't as heavy as mayo but doesn't fall short on flavor.


I threw in some carrots for color. I served this for dinner as sort of a salad medley, this salad along with a couple of others. I must have eaten a heavy lunch because the light meal hit the spot.

This potato salad reminded me of this spectacular salad I made last summer. I think both of them deserve a regular rotation alongside Grandma Sarah's more traditional potato salad.

Some of you may not think this could be a meal, but I would disagree. Top it with a sliced, hard boiled egg, and it sounds like a perfect lunch to me. Maybe that's what I'll do if I ever have leftovers. One can hope.

Lemon Yogurt Potato Salad

4 to 5 medium yellow potatoes, cut into equal-sized cubes

3 carrots, peeled and thinly sliced on the bias
1 small onion, thinly sliced

Juice of one large lemon

Roughly 1/2 cup plain yogurt

1 tablespoon white wine vinegar

Handful of parsley, chopped

S&P to taste

Olive Oil


In separate bowls, toss potatoes and carrots with olive oil, salt and pepper. Roast in a 400 oven on separate cookie sheets until cooked through. About 10 minutes for the carrots and 20 minutes for the potatoes. Combine onion, lemon juice and vinegar and set aside. Once potatoes and carrots have cooled enough to handle, toss them in a large bowl together. Combine onion mixture with yogurt. Add parsley and salt and pepper. Pour dressing over potatoes and carrots and gently toss to combine. Serve room temperature or cover and refrigerate for later service.

29 March 2010

Comfort in the kitchen

Every morning Seth cooks himself a fried egg while I cook oatmeal. We're usually in the thick of keeping the boy and the dog from destroying the house while we both itemize the tasks ahead of us in the day. I enjoy this time, especially since it's usually the one meal we all share each day, but I still miss time in the kitchen with other women.

Every time I return home I find myself in my mother's kitchen and in my mother-in-law's kitchen chopping onions, cooking dinner all while we catch up, gossip and chat about this and that. It's one of the things I miss the most about living so far away from my family. That chance to be together in the kitchen with such casual purpose, just being ourselves.

Last night I hosted my book club girlfriends plus one nice, brave man who joined us as a guest. We had just read "The Help" by Kathryn Stockett about a racially divided town in the early 1960s and one junior league woman who sets out to tell the stories of the southern small town's hired help. My menu was a traditional nod to the culture with fried chicken, buttermilk mashed potatoes and cream gravy with a green salad with buttermilk ranch dressing and cornbread served with honey butter.


It sounded delicious, but by the time the guests started arriving, things took a downturn. I'd been up most of the previous night with a sick kid and spent most of the day wishing someone else would cook that meal. I was running behind and wasn't keeping my eye on the chicken while I should have. That's when my friend Kim stepped in. She finished unloading my dishwasher and then made the salad dressing. Then she started in on the gravy. We laughed about our goofs and came up with a few quick fixes while the others enjoyed a glass of wine and chatted in the other room.

In the end, the meal was fantastic. Not because of the food, but because a group of friends sat around the table and laughed the night away. It made me appreciate how nice it is to have good friends, and it made me remember how much I enjoy another woman's company in the kitchen. Whether it's drying dishes or trying not to burn gravy, it's so much more fun with a friend.

Here's one little recipe from the night. It's a fantastic cornbread recipe from Fannie Farmer and the delicious honey butter to serve it with. I hope you have someone to cook with soon. Everything is just a bit more fun when you have company.

Corn Bread
The Fannie Merritt Farmer Boston Cooking School Cookbook

Mix and sift together
3/4 cup corn meal
1 cup flour
1/3 cup sugar
3 teaspoons baking powder
3/4 teaspoon salt
Add
1 cup milk
1 egg, well beaten
2 tablespoons shortening, melted*

Bake in a shallow buttered pan, 8 by 8 inches, at 425 degrees for 20 minutes.

*I used butter, but the book notes that butter, bacon fat, chicken fat or beef drippings can be used.

Honey Butter

1/2 stick butter, room temperature
2+ tablespoons honey

Combine the butter and honey in the bowl of a stand mixer and whip together until thoroughly combined. Taste for sweetness, add more honey as desired. Once honey butter is made, you can spoon it into a shallow bowl, fill molds with it and refrigerate or create a log and refrigerate. I filled a round mold to make a disc and placed the disk in a shallow bowl. Be sure the butter is soft when serving.

22 March 2010

The first day of spring

This weekend was one of those that reminded me the warmer days of summer cannot be too far away. It was about 70 degrees here Saturday with lots of sun, and, as if that was not enough, it was the opening weekend of the farmer's market. My apologies to my family in Oklahoma who suffered a cruel joke of a heaping snow on the first day of spring.

We spent our Saturday mostly in our backyard, working in our garden, so excited about the months to come. We just prepped the beds and transplanted some herbs that had overstayed their welcome. When you see how crazy mint grows, you'll laugh the rest of your life when you see a $4 bundle of it in the grocery store.

We also spent time doing things like this.


We got three chicks about a week ago and have been having fun watching them grow, literally, day to day. Jasper is cute and pulls his tiny lawn chair into the garage where we're keeping them for now and sets it up just outside their bin to watch them bounce around under the red light. On Saturday, we pulled them out into the yard for the first time. It was fun to watch them, although I think they were pretty scared at the expanse our tiny back yard must have appeared to them.

Before the sun sank too low, we fired up our Weber and grilled buffalo burgers and carrots tossed in olive oil and a Moroccan spice mix. Sharp shredded cheddar went atop the burgers and the carrots were tossed with arugula for a salad. It was a happy meal.


To tide us over, I pulled together a little snack. I suppose you could call it a dip or a salsa, but it seems most like a relish to me. It's simple and quick and so flexible, it can indeed find a place on your table through summer.

It's just diced avocado, a can of black beans, corn and lime juice. In the summer, I will no doubt serve up the same dish with cilantro from the garden, bright orange cherry tomatoes and sliced peppers. It's great with chips or put it atop rice, fish, chicken, tacos or quesadillas. It's addictive and simple, and you will not have to worry about leftovers. Promise.


Avocado, Black Bean and Corn Relish

1 ripe avocado, large dice

1 can black beans, rinsed and drained
1 cup of corn (rinsed canned or thawed frozen)
Juice of 1 small ripe lime

Coriander and salt to season


Combine ingredients and let stand at room temp for at least 10 to 15 minutes. Stir gently and serve immediately.

16 March 2010

Pesto Picnic

Things have been a little crazy around my house these days. In the past four days we've hosted my parents who are in town for a visit, bought three baby chickens which are now living in a Rubbermaid bin in my garage and made a late-night trip to the emergency room for a boy sick with croup.


Somewhere in there before the kid was sick, we squeezed in a trip to the zoo, and I needed a lunch that would feed four adults and a kid without much fuss. I thought given everything else that's going on, I'd just make it a theme to be fuss-free for a few days. This pasta dish is perfect for just such occasions. It's made straight from your pantry when you want something a little more upscale than a peanut butter and jelly. In fact, I made it when I catered my cousin's bridal luncheon and just topped it with grilled shrimp for a sophisticated feel.

So if you could use a recipe for a dish that can easily go from brown-bag lunch to Saturday entertaining, write this one down. And in full disclosure, in case it's not blatantly obvious, it's not my recipe any more than anyone owns a pesto recipe. This is just the way I make it.


Lemon Artichoke Pesto

1 pound pasta (I like a short-cut like rotini with lots of curls to scoop up pesto)
About 1/8 cup toasted pine nuts
About 1/4 cup grated Parmesan cheese
1 can artichoke hearts, drained
Juice of 1 large lemon
1/4 cup, plus, olive oil
salt and pepper to taste
Handful of arugula (or parsley or any other soft-leaf herb you like)

Cook pasta according to package directions. Once drained, toss in olive oil and let it cool. Set aside. Place the remaining ingredients in the work bowl of a food processor and whiz it all together until it combines, adding in additional olive oil until you get a consistency similar to a grainy mustard. Toss pasta in pesto and either serve immediately or refrigerate.

08 March 2010

Extraordinary, right at home

As a kid, I liked being the one at the table who was willing to try anything. Let me just make clear, though, that I'm not referring to my grandmother's aspic, and my family didn't really get past the Bible Belt in our car trips, so I'd never even heard of something like calamari. I'm talking about lamb fries, alligator and mushrooms. Yes, there was a time in my life when mushrooms seemed pretty exotic.

I might have thought I'd traveled to France, but nope, just Fort Worth, Texas. That's where my Uncle Tom and Aunt Glynis lived. I must have been in grade school, but I remember so very clearly watching Glynis cook sliced portabella mushrooms in a red wine sauce. She served them alongside steak. Everything at their house seemed a little extraordinary to me what with my older cousins, their bird and the way Santa once delivered My Little Ponies to me on Christmas morning at their house.


But those mushrooms were extraordinary. Tasting them flipped a little switch in my head, like etching in a permanent note that not all foods foreign to me were bad. Some of them, in fact, are delicious.

I'm guessing I would have gotten around to trying mushrooms whether or not Glynis made them that night for us, but I am so thankful I fell in love so early.

I now love buying wild mushrooms from a picker at my farmers' market, and I know enough to know that's the guy who knows how to cook a mushroom. Get one raw plucked from a salad bar, OK. But get one that's golden from a saute in butter with just a sprinkling of salt, and, Hell-o, Mushroom.


There is absolutely a right way to cook a mushroom, and too often cooks serve up a wet, dark mass that epitomizes the mush in mushroom. But cook them right, and you've got the start of something magical.

I made a mushroom soup last week that starts no less than 10 cups of sliced mushrooms, and just to note, the pre-sliced variety are too thick. Yeah, it's a lot of work, I suppose, but I guarantee if you taste a well cooked mushroom, it just might change your outlook on at least the rest of your day.

I worked in three batches, sauteing my mushrooms in butter and olive oil, giving them a chance release their liquid and them caramelize in it. The batches are so you don't crowd the mushrooms, which will get you a steamed, tasteless khaki blob. Much like cooking other veggies correctly, you can't stir these guys every five seconds either. They need time on the heat, in contact with pan, not sandwiched in an inch-thick layer or mushrooms. If they're cooked correctly, those 10 cups will turn in to no more than three.


The good news is that once you get the mushrooms cooked off, the rest of the soup comes together quite easily. It's a hearty, thick soup that is no doubt a meal, even for the meat eater.

There's not too much of winter left, so let's trot out those recipes that in just a few short weeks will seem (thankfully) out of season. Serve this soup with some delicious crusty bread and snuggle on the couch. You may not be going anywhere exotic, but those mushrooms just might make you feel extraordinary right at home.

Hungarian Mushroom Soup
Adapted from Old Wives Tale in Portland, Ore.

8 tablespoons butter
Roughly 6 - 8 tablespoons olive oil
Roughly 2 pounds mushrooms (such as crimini)
2 medium yellow onions, diced
1 teaspoon paprika
1/2 teaspoon turmeric
5 cups milk, room temperature
5 tablespoons flour
1 cup sour cream, plus more, if desired
2 to 4 cups water
dried dill
salt and pepper

Thinly slice mushrooms, stems and all. In a heavy-bottomed, large pot, saute 1/3 of the mushrooms in about 1 tablespoon of butter and 1 tablespoon olive oil. Saute until mushrooms are golden brown and the moisture has cooked off, about 7 to 10 minutes. Remove from pot and set aside. Work in batches, repeating until all of the mushrooms are cooked, remove from pot and set aside. In the same pot, saute the onions in a little olive oil. Once the onions are nearly cooked through, add the turmeric and paprika and continue cooking until onions are cooked. Remove from the pot and set aside with mushrooms. Add five tablespoons of butter to the empty pot and melt over medium heat. Once butter is melted, make a roux by adding flour and whisking for about two minutes while cooking. Then add the milk, whisking to bring together roux and milk. Season with salt and pepper and bring to a slow boil. Add mushrooms, onions and water, one cup at a time until desired consistency, to the milk mixture. Season with salt and pepper to taste, and simmer on low heat for at least 30 minutes. Just before serving, finish with dried dill and stir in sour cream until soup is smooth.

Note: If you prefer, you can skip the roux steps and thicken the soup with a corn starch slurry, but the roux does produce a richer flavored soup.

You can give you soup another boost by adding a few chopped, dried mushrooms soaked in warm water. Then, use that soaking water to substitute the remaining water in the recipe.

01 March 2010

How could something so good be so simple?

Before I tell you about one of the most delicious dinners I've made recently, I wanted to share a recipe I found on the blog Orangette.

It's for oatmeal pancakes, and I have to say it's one of the -- if not the -- best pancake recipes I've ever eaten. And don't be turned off if you're not an oatmeal fan. Honestly, Seth would never have known there were oats in there if I hadn't told him. If you are, however, a fan of sweet, salty, buttery goodness, then warm the griddle. Check it out here, but do come back and read about my pasta dish.

So this pasta, it's the kind of quick meal that puts the whole 30-minute-meal phenomenon to shame. There are no gimmicks. It's simple and delicious, and very, very addictive.


I found this recipe a few weeks ago for Bagna Cauda Broccoli. Bagna cauda is the Italian sauce of olive oil, butter, garlic and anchovies, and if you don't believe my praises, believe that the Italians know a little something about simple and delicious.

I expanded on this recipe for some friends, tossing in cauliflower to the mix. Then one night last week when 5:30 rolled around, and I didn't have dinner on the stove, I reached for some spaghetti, cranked the oven and went to work.


I roasted some broccoli, cauliflower and carrots, cooked the pasta, made the sauce and tossed the whole mess together. There really are very few words to describe how great this dish is. I even used whole wheat pasta without batting an eye. It was unbelievable. Seriously. And the beauty of it is that the sauce takes only a couple of minutes to make. You could add any roasted veggies you want -- or none. Do add the nuts, though. Toss 'em in the dry skillet just before making the sauce to toast them slightly. I'm all about using one pan for many tasks. The dishwasher will thank you. And in my house, that's me.


Below is the recipe. And if you think you don't like anchovies, just squint your eyes and plow through this. When you're eating it, you won't even notice they're in there, and they add a salty taste that is surprisingly unfishy-like.

If you're feeling generous, share. If not, I'll understand.


Bagna Cauda Pasta

4 to 5 tablespoons butter
2 to 3 tablespoons olive oil

several garlic cloves, minced

4 or so anchovy fillets, mashed with the back of a fork

3 or so cups of veggies such as broccoli, cauliflower, onions or carrots, trimmed or diced

1 lemon, juiced

Splash of white wine

Handful of nuts such as pine nuts or walnuts

1/2 pound of spaghetti or other pasta

Olive oil

Parmesan cheese

S & P


Preheat oven to 375 degrees. Prep the veggies, cutting them all into similar size pieces so the roasting times will be the same for all. Toss veggies in olive oil to coat and season with salt and pepper. Spread them in a single layer onto a cookie sheet. Place in the hot oven until slightly browned and tender throughout (about 15 minutes if your pieces aren't too big).

Boil salted water for pasta, and cook until tender. In a dry skillet over medium heat, toast nuts, shaking the pan, careful not to burn them. Remove nuts and set aside. Now in the skillet, combine butter and olive oil and melt over medium heat. Once melted, add garlic and anchovies and cook, stirring for about three to four minutes. Add the lemon juice and white wine. Reduce over low heat for about four to five minutes then remove from heat.


Combine the pasta, veggies, nuts and sauce in a large mixing bowl and toss gently to coat. Top with finely grated Parmesan cheese and enjoy.

22 February 2010

A winter salad to love

Tossing a handful of decent greens, chopped veggies, nuts and a drizzle of olive oil will no doubt produce a respectable salad. But when you stop thinking salads are limited to raw vegetables, great things will happen, especially in winter when the bounty of summer seems only a distant memory.


I was to bring salad along to two different events over the weekend, and mostly because I'm lazy, I didn't make the time to shop especially for those events. So, I decided that some beets, arugula and blood oranges would have to do because that's what I had in the house. And I was not disappointed after roasting the beets, pickling some onions and zesting that blood orange.

The salad was delicious with the sweet beets and blood oranges balanced with the peppery arugula and the slight tang of red wine vinegar from the pickled onions. Not bad for lazy winter day, eh?


Another perk of this salad was how well it traveled. I took it about three blocks down the street in the basket of the jogger stroller for one event and then about 50 miles away to another tucked in a bag in the back of the car. All of the toppings rode snugly in half-pint jars sealed with a lid, the onions still swimming in vinegar and the oranges in olive oil. Just before chow time, toss them all in a large bowl with arugula and enjoy. Winter may not be such a bad season after all.


Roasted Beet, Blood Orange and Arugula Salad

2 medium-sized beets, peeled and trimmed
1 large blood orange, zested then segmented
1/2 small onion, thinly sliced
4 to 5 handfuls of arugula
red wine vinegar
olive oil
salt and pepper
cheese (optional) such as Beechers or other farmhouse cheddar broken into small clumps

Preheat oven to 375 degrees. Place the beets in a baking dish, wide end down, then drizzle with oil and sprinkle with salt. Roast beets until tender throughout, about 30 to 40 minutes. Remove from oven and completely cool.

Place thinly sliced onions in a small bowl or half-pint jar. Add just enough red wine vinegar to cover onions. Set aside for at least one hour, preferably a couple of hours. Onions will be limp and pink when ready.

Zest the blood orange and put zest in another small bowl or half-pint jar. Add about two tablespoons olive oil to zest. Add a healthy pinch of salt and a little pepper. Segment the orange and transfer the segments directly into the jar with the oil mixture. Cover and set aside. Refrigerate if it is more than two hours before serving.

Thinly slice cooled beets either on a mandolin slicer or carefully with a chef's knife. Set aside beets, covered and refrigerated until ready to eat.

To prepare salad, let any refrigerated ingredients come up to room temperature. Then place arugula in a large bow. Dump in the orange and oil mixture. Add beets, separating as you go, as the thin slices will stick together. Pull the onions out of the vinegar with a fork and add to the greens. The vinegar on the onions will be enough for the dressing. Add cheese if you want then toss the whole thing together. And at the end of the meal, I suggest using a chunk of bread to mop up the beet-orange-vinegar liquid that will coat the bottom of the bowl.

15 February 2010

A cookie recipe to write down

It's pretty common around our house that when about 9 pm rolls around and we're snuggled on the couch enjoying an episode of whatever TV show via Netflix has us captivated at the moment, Seth will look at me and ask, "Do we have any dessert?"

We often settle for a sliced pear, toast with Nutella or ice cream topped with strawberry jam. But some nights we eat warm chocolate chip cookies, and those are the nights when just about everything in the world seems right, even if for just a moment.


Seth asked for cookies on a recent evening when I had none to offer. But the next rainy afternoon seemed like just the day for baking cookies. It was then that I realized I didn't really have a go-to recipe for chocolate chip cookies. It's one of those recipes that you can find anywhere, like say the back of a bag of chocolate chips, so why would you need to write one down? Well, it turns out there is a good reason.

Most of those standard recipes will suffice. They'll produce a nice golden cookie studded with chocolate. But every once in a while we eat a chocolate chip cookie that reminds us that even the ordinary can be extraordinary.


I remembered a recipe I'd read nearly two years ago from the New York Times about the best chocolate chip cookie. A quick online search and I'd found it precisely. Although I didn't bake them when I first discovered this recipe, I remembered what set them apart -- a sprinkle of sea salt atop each mound of cookie dough. The recipe also calls for cake flour. Cake flour has a lower protein content than, say, all purpose flour. The lower protein content means the flour will produce less gluten and, in turn, be lighter and fluffier than higher-protein flours. I used cake flour, and I was rewarded with a soft cookie that spread nicely in the warm oven.


Any cookie, no matter the recipe, just tastes better warm, so bake only what you need, freeze the remaining dough, already mounded into cookies. That way, you just pull them out and bake one, two or twelve cookies at a time.

Chocolate Chip Cookies
Adapted from Jacques Torres Originally published in the New York Times, 2008

Time:
45 minutes (for 1 6-cookie batch), plus at least 24 hours’ chilling

2 cups minus 2 tablespoons

(8 1/2 ounces) cake flour

1 2/3 cups (8 1/2 ounces) bread flour

1 1/4 teaspoons baking soda

1 1/2 teaspoons baking powder

1 1/2 teaspoons coarse salt

2 1/2 sticks (1 1/4 cups) unsalted butter

1 1/4 cups (10 ounces) light brown sugar

1 cup plus 2 tablespoons (8 ounces) granulated sugar

2 large eggs

2 teaspoons natural vanilla extract

1 1/4 pounds bittersweet chocolate disks or fèves, at least 60 percent cacao content (see note)

Sea salt.

1. Sift flours, baking soda, baking powder and salt into a bowl. Set aside.

2. Using a mixer fitted with paddle attachment, cream butter and sugars together until very light, about 5 minutes. Add eggs, one at a time, mixing well after each addition. Stir in the vanilla. Reduce speed to low, add dry ingredients and mix until just combined, 5 to 10 seconds. Drop chocolate pieces in and incorporate them without breaking them. Press plastic wrap against dough and refrigerate for 24 to 36 hours. Dough may be used in batches, and can be refrigerated for up to 72 hours.

3. When ready to bake, preheat oven to 350 degrees. Line a baking sheet with parchment paper or a nonstick baking mat. Set aside.

4. Scoop 6 3 1/2-ounce mounds of dough (the size of generous golf balls) onto baking sheet, making sure to turn horizontally any chocolate pieces that are poking up; it will make for a more attractive cookie. Sprinkle lightly with sea salt and bake until golden brown but still soft, 18 to 20 minutes. Transfer sheet to a wire rack for 10 minutes, then slip cookies onto another rack to cool a bit more. Repeat with remaining dough, or reserve dough, refrigerated, for baking remaining batches the next day. Eat warm, with a big napkin.

Yield: 1 1/2 dozen 5-inch cookies.

* When I made them, I halved the entire recipe and made smaller cookies (about 3 inches) and wound up with about 18 cookies.

08 February 2010

Grapefruit Cake

I was intrigued recently when a friend on Facebook updated her status to say she was making a grapefruit cake. I usually just slice mine in half and sprinkle a little sugar on top for a winter breakfast treat. But when I started to think of using grapefruit just as you would any other citrus, I got excited. Cakes, sorbets, salad dressings and fish dishes. This is clearly not just a breakfast food.

Thankfully Ellen responded promptly to my Facebook request for the recipe and within a day I had one baking in my oven. After reading through the recipe, I quickly realized this wasn't some sexy cake with pillowy peaks of icing that belonged on the pages of a food magazine. It was a humble cake, baked in loaf pan and drizzled with a thin icing.


The cake reminded me of a lemon bundt cake my grandmother made a few times, but that cake had an overpowering lemon flavor that must have come from Jell-O powder or something else clearly not once a lemon.

But this cake was better. In fact, the grapefruit flavor was very subtle and grew slightly stronger in the days after it was baked. That humble little cake was really beautiful with its delicate, dense and slightly sweet flavor. The interior was peppered with grapefruit zest and the top was sticky moist with a grapefruit syrup.

The fact that the cake resembled a loaf of sweet bread was alright by me. It made me feel a little less indulgent as I shoved a piece in my mouth right over the sink for a mid-morning snack.

Call it dessert or call it breakfast, but this is a cake recipe to keep around.

Grapefruit Cake
Thomas Keller’s Ad
Hoc at Home

Cake
2 cups flour
1 ¾ teaspoon baking powder
1 2/3 cups granulated sugar
1 teaspoon kosher salt
2 eggs
1 cup whole milk
¾ cup canola oil
1 tablespoon grated pink grapefruit zest
1 teaspoon vanilla extract

Grapefruit Syrup
1 cup strained fresh pink grapefruit juice
2/3 cup granulated sugar

Grapefruit Icing
¾ cup powdered sugar
1 tablespoon plus 1 teaspoon fresh grapefruit juice

Preheat oven to 350 degrees. Spray a 10x4 or 9x5 inch pan or lightly oil it.

Sift flour and baking powder. Stir in the salt. Set aside.

Combine the sugar and eggs in a mixer and beat at medium speed for 3 minutes until the mixture is thickened. Beat in the milk, then the oil, grapefruit zest and vanilla. Reduce the speed to low and add the flour mixture, mixing just to incorporate.

Spread batter in the pan. Put the pan on a small baking sheet and bake for 30 min. Turn the pan around and bake for another 30 min. Transfer the pan to a cooling rack.

Meanwhile, combine the grapefruit juice and sugar in a small saucepan, bring to a simmer, stirring to dissolve sugar. Simmer one minute. Set aside.

When you remove the cake from the oven, using a long skewer, poke deep holes every ¾ inch or so all over the top. Immediately begin brushing the syrup over the cake. It may be necessary to wait for the syrup to soak in, but continue until you’ve used all the syrup. Let the cake cook for about 10 min.

Unmold the cake onto a cooling rack. Turn it right side up, and let cool to room temperature.

Stir the powdered sugar and grapefruit juice together in a bowl until smooth. Using a soon, drizzle the icing on a diagonal over the top of the cake, allowing it to drip down the sides. Slice and serve. Enjoy!

01 February 2010

Tortillas + Fish = Quick Dinner

Tortillas have been a pantry staple in my house for some time, and lately I've been reaching for them more and more.

Add avocado and salt for a tasty snack. Or scrambled eggs and sharp cheddar for breakfast, or cut into strips and pan fry for a soup or casserole topping. There's good reason tortillas are a staple to Mexican cuisine -- fresh, fried or stale, they're the start of many a meal.

They saved me one night last week when I was staring at the fridge trying to decide what to cook while my son, starved for attention, tugged at my leg. I needed to come up with some dinner, and quick.


That's when I thought: tortillas + fish + veggies + canned beans.

I'm not offering a formal recipe, but more of an account of my meal. The idea is that the dish is easy to make and flexible, so I give you the basics and then you adapt it to your own pantry and skills set. Simple enough?

I sliced a white fish fillet into strips about 1/2 inch thick. Then, the fish was tossed in a mixture of mostly cornmeal with a little flour, salt, cumin and coriander -- that's right, skip the messy, wet step of typical frying. Preheat a frying pan with a shallow (about 1/4 inch) dose of oil like vegetable or canola. Once the oil is hot, drop the fish strips in. Fry until golden, and then turn to cook second side (just a couple of minutes total cooking time).

I placed my fish strips on warm tortilla along with some sauteed veggies, although shredded cabbage would have been tasty, too. Then I topped the whole thing with a sauce made from mashed avocado, lime juice and yogurt. Warmed, canned beans made it a square meal.

25 January 2010

My tool box

I'm not a sucker for kitchen gadgets. It helps that I'm cheap, but I also have always followed a pretty good rule: There are very few kitchen tools you need that perform just one task.

I used to say there were no kitchen tools you need that were one-task wonders, and then a friend pointed out to me that a cherry pitter is a handy tool despite the fact that we couldn't think of another use for it. So, buy the cherry pitter, but think twice about avocado slicer, the orange peeler and the grapefruit knife.

In this food-obsessed world, it's no surprise that retailers have pegged us American home cooks as gluttons for FoodTV-endorsed gadgets. I do not need a George Foreman Grill, Rachael Ray's Bubble and Brown nor Emeril Lagasse's Deep Fryer.


What I do need, what every cook really needs, is a great chef's knife.

My knife is the one tool that gets used over and over again each day when it comes to everything from a whole chicken to an apple. It's a decent knife, but not the top of the line. I've had it for about seven years, and I'd guess I'll be using it for many more.

So I wanted just to share with you a few tips when it comes to your kitchen knives. Here goes:
  • Despite what the sales person told you, you do not need a different knife for every kitchen task. Spend your money buying just three good knives: A chef's knife, a paring knife and a serrated bread knife.
  • There are two types of metal knife construction, forged and stamped, and it's important to know the difference when shopping. Forged knives are typically heavier, sturdier and more durable. These are easily spotted as the type of knife where the blade and handle are all one piece, making the handle heavier and easier to use. Forged knives are typically more expensive but will last a lifetime if cared for since they can be professionally sharpened. Stamped knives are lighter in weight and less durable. These knives typically have a handle that is made of wood or plastic.
  • It's true that you are more likely to cut yourself with a dull knife than a sharp one, so get your knife professionally sharpened regularly. Home-sharpening tools help correct the beating knives take in daily use, but they simply can't as good a job as the pros. My local hardware store sharpens knives. Look for stores that specialize in knives. If they don't sharpen, they can tell you who can. Some kitchen stores have knife-sharpening hours as well.
  • A serrated knife can't easily be sharpened, but if it's used properly it should last a long time. Use serrated knives to slice breads, cakes and other soft, delicate food items. Because slicing breads doesn't take the same manpower as chopping a dozen onions, it's OK to go with a less expensive serrated knife.
  • If you use a block to store your knives, insert them upside down. This will keep the blades from dulling as they're pulled in and out. Other good storage options are magnetic strips mounted above a work surface.
  • Even though that granite you love won't be scratched, it's still not the place to chop and slice. Use wood or plastic cutting boards, not glass or other hard, solid surfaces, which will dull your knives. Also, knives can slip on hard cutting surfaces, making it way to easy to cut yourself instead of the food.
  • When shopping for a chef's knife, get your hands on it. You really need to actually slice something (think onion, not banana) to get a feel for how comfortable it is to work with. Specialty kitchen stores or knife shops sometimes give customers the chance to try out knives.

18 January 2010

An easy recipe

What makes a recipe easy isn't very simple to explain. Easy can mean fast, no-professional skills needed or maybe it means you've got all the ingredients in your pantry. But what can be most troublesome is that easy does not always equal convenient.

Take the recipe for no-knead bread I tried out a few days ago. I first tasted this homemade bread in the days after Jasper was born. Our friend Vickie brought a loaf over along with a boatload of Pasta Fagioli that was amazing. Although I could not remember to ask her for the recipe for nearly a year and half, I somehow remembered that she said it was baked in a Dutch oven. It was simple enough, she said, and sent along the link to this New York Times story.

The ingredient list is short: flour, salt, yeast and water. What isn't so short is the time. This bread takes time, and a lot of it. Thankfully, you don't have to do much to it, though, aside from let it hang out snug in a covered bowl for 18 hours. Then, simply turn it out, and let it rise for another two hours.


I have now made three loaves of this bread, and two of them have turned out delicious (the third went to my friend Eileen who has a brand new baby on her hands, and I have no expectations of a sleep-deprived momma calling me to discuss the crumb of my bread). The trouble was that the first loaf ended up bottomless because it stuck like glue to the pot I'd baked it in. The recipe just calls for a heavy-bottomed pot with a lid, and since I don't have a Dutch oven, I substituted my 6-quart soup pot. The second loaf went to the oven in my round, glass Pyrex with much better results.

On the third round, I learned that this bread was actually pretty easy to bake. It was a nice reminder that just because something doesn't turn out right the first time doesn't mean you shouldn't try it again. After all, I'd only really invested three cups of flour into this thing.

Here is the recipe as it ran in the New York Times with my baking notes to the side. Try it at least twice. It will get easier. Promise.

And a side note, a dead camera battery kept me from uploading photos from two weeks ago. Check out this post with photos now.

No-Knead Bread Published November 2006 in The New York Times Adapted from Jim Lahey, Sullivan Street Bakery
Time: About 1½ hours plus 14 to 20 hours’ rising
Yield: One
1½ pound loaf

3 cups all-purpose or bread flour, more for dusting
¼ teaspoon instant yeast
1¼ teaspoons salt
Cornmeal or wheat bran as needed.

1. In a large bowl combine flour, yeast and salt. Add 1 5/8 cups water, and stir until blended; dough will be shaggy and sticky. Cover bowl with plastic wrap. Let dough rest at least 12 hours, preferably about 18, at warm room temperature, about 70 degrees. I could not for the life of me figure out the 1 5/8 cup of water, so thank you Google. I used 1 1/2 cups plus 2 tablespoons. Also, I rubbed the bowl lightly with oil, and I did allow mine to rise for the full 18 hours.

2. Dough is ready when its surface is dotted with bubbles. Lightly flour a work surface and place dough on it; sprinkle it with a little more flour and fold it over on itself once or twice. Cover loosely with plastic wrap and let rest about 15 minutes.

3. Using just enough flour to keep dough from sticking to work surface or to your fingers, gently and quickly shape dough into a ball. Generously coat a cotton towel (not terry cloth) with flour, wheat bran or cornmeal; put dough seam side down on towel and dust with more flour, bran or cornmeal. Cover with another cotton towel and let rise for about 2 hours. When it is ready, dough will be more than double in size and will not readily spring back when poked with a finger. The generous coating of flour on both the towel and the top of loaf is very important so that it does not stick. Don't skip this step and be very generous. And next time I might even do a light coat of oil on the bottom and sides of the pan.

4. At least a half-hour before dough is ready, heat oven to 450 degrees. Put a 6- to 8-quart heavy covered pot (cast iron, enamel, Pyrex or ceramic) in oven as it heats. When dough is ready, carefully remove pot from oven. Slide your hand under towel and turn dough over into pot, seam side up; it may look like a mess, but that is O.K. Shake pan once or twice if dough is unevenly distributed; it will straighten out as it bakes. Cover with lid and bake 30 minutes, then remove lid and bake another 15 to 30 minutes, until loaf is beautifully browned. Cool on a rack. The towel bit is important, I think. It helps get the loaf into the baking dish without disrupting it too much. My oven required only the additional 15 minutes after removing the lid. Be sure to check it early and remove when the top is browned.

11 January 2010

Happy plates

Sunday morning Seth walked down the street to buy the Sunday paper while I made some banana chocolate chip muffins for breakfast. When he returned, the three of us sat around the table enjoying our muffins while Seth flipped through the paper, and I thumbed through Parade. Jasper was busy playing with the chocolate on his fingers.

I absolutely hate that I love Parade. It seems like a fake magazine. I mean, if you wanted real news, wouldn't you just stick to the newspaper that it comes wrapped in? And even the celebrity gossip news is second rate. But I do love it. Always have, thanks, I think, to my mom. I love to read the celebrity questions on page 2, the Amish fireplace ads and the recipes that look like they're ripped out of Woman's Day. Yes, I know it's hardly the recipe as prose of Julia Child, but it never hurts to read 'em.


I noticed a recipe for a Maple Orange Chicken. It sounded simple enough, a close cousin to that Sweet & Sticky Chicken I love.

While trying to settle on a side dish for the meal, I remembered a can of coconut milk I had in the pantry. So I made coconut rice and added steamed, cubed sweet potatoes to it. We served the chicken and its sauce right over the top. We all cleaned our plates, and Jasper wouldn't stop eating until we gave him the last little bit of rice.

At my dinner table, we decided this was a keeper: A weeknight dinner recipe that was sure to please again and again.

Coconut & Sweet Potato Rice

1 16-ounce can of coconut milk
1 cup Jasmine rice (or other fragrant white rice)
1 large sweet potato, peeled and cubed
Coriander
Salt
Water

Combine coconut milk and enough water to equal two cups of liquid. Pour liquid into medium sauce pan, season liberally with salt and bring to a low boil. Add rice, stir and cover. Simmer for approximately 15 minutes or until rice is tender and most of the liquid has been absorbed. Add a dash of coriander and season with additional salt if necessary. In a separate pan, steam sweet potato cubes. Combine rice and sweet potato. This could be done ahead and reheated before service.

Maple Orange Chicken
Adapted from Parade

4 boneless, skinless chicken thighs
2 tablespoons maple syrup
2 tablespoons orange marmalade
2 tablespoons water
Juice of 1/2 lemon
Salt and pepper
Olive oil

Drizzle enough oil to coat the bottom of a heavy-bottomed skillet and heat over medium-high. Season both sides of chicken and place chicken in a single layer in the hot pan. Cook until golden brown and chicken releases easily and flip to cook second side. Depending on the thickness of the chicken, the meat may need additional cooking. If so, transfer browned chicken to a baking dish and place in a 350 degree oven until chicken is thoroughly cooked. Remove chicken from skillet and place heat on medium low and combine the syrup, water and marmalade. Whisk to remove the bits from the bottom of the pan. Once sauce comes to a low boil, reduce heat and cook another couple of minutes. Turn the heat off, add the lemon juice and season to taste. Toss the chicken in the sauce and serve.

05 January 2010

An old gift

So you may have noticed I blew my deadline this week. If I told you that on Monday, when I usually make my post, I woke up at 3:30 am after about 4 hours of sleep, spent about 8 hours in airports or airplanes with my 15-month old, while battling a cold, would that be a good excuse?

Hope so, because I wanted to share a little gift I got while spending Christmas and New Year's with our families in Oklahoma. We all received so many gifts from our generous relatives. I have to say, though, one of the things I will treasure most wasn't a gift at all, but more like passing on of something that may have otherwise been destined for the recycle pile. It was a yellowed note card in my grandmother's handwriting. We call her Mom, and to the surprise of most everyone outside of the family, this has never been confusing. Mom was never an avid cook. She raised three Baby Boomer boys through an era of deep freezer foods, Jello salads and canned produce. She was always the hostess and made appetizers like celery stuffed with pimento cheese.

She and my grandfather, Pop, who are 83 and 85 respectively, recently moved out of their home of more than 40 years. It was a sad event to see them leave the house where they'd hosted those countless family holidays. And the magnificent, over sized lot where their ranch house stood. There was a magnolia tree in the front where, perched on various branches, my cousins and I spent lazy summer afternoons. And the backyard was a forest compared to my family's newly-built subdivision lot, and it made for the best Easter Egg hunts on the planet.


That recipe card was for a dish called Wild West Corn. It's a silly name for what I gather would have been a ubiquitous dish in its era. It's basically cream cheese, milk, corn and peppers, served in a casserole.

I decided to make it last night to go along with our pulled pork sandwiches, and while I was warming the cream cheese and milk, I began to think about how out of place this recipe seemed at the moment. The trendy cooks today look for non-GMO corn, preferably fresh and in season. Hiding it in cream cheese would seem inappropriate to say the least. But that's how recipes from another decade can seem. Out of context, they can be meaningless.

It comes from an era where weeknight dinners at Applebee's weren't even an option. And many women cooked for their families every meal, seven days a week. And these were Boomer families with several kiddos. It only makes sense that you'd depend on a few dishes that came from pantry staples, were cheap, fed a crowd and the kids would eat.


Obviously, Mom thought this recipe was good enough to copy and add to her recipe file. I don't know how much she actually made it, and I don't remember ever eating it at her house. It wasn't bad, but, not surprisingly, it tasted like corn and cream cheese. I sauteed chopped onions and red pepper instead of pimentos, and I left out the chilies in hopes Jasper would like the dish.

I'm passing this recipe on to you not because it's the latest thing to wow your dinner guests with. But read through it and think about what recipes you'll be passing on to your future generations and what they say about your family right now. And if you do want to make it, I suggest getting a little creative. Add some spicy sausage, cheddar cheese, frozen hash brown potatoes. Or make it in the summer with fresh corn and just enough cream cheese to hold it together.

I'll treasure this old recipe card, and not because of the dish, but because when I hold it in my hands, I'm linked to a kitchen so foreign and so close to me. It's a way to remember where I came from and a reminder of the cook I want to be.

Wild West Corn
Margaret "Mom" McFall

1 8-ounce package of cream cheese
1/2 cup milk
1 4-ounce can green chilies, diced
1 2-ounce jar of pimentos
1 teaspoon salt*
2 cans whole-kernel corn, drained**

Melt cream cheese and milk, stirring constantly. Add remaining ingredients. Pour into buttered casserole dish. Bake 30 minutes, uncovered at 350 degrees. (Double for a 9-by-13-inch pan.)

*If using frozen corn, add additional salt to taste.
** I used about five cups of frozen corn instead of the canned.


28 December 2009

Bread for a winter's night

When it's cold outside, and all you want is a warm bowl of soup and huge chunk of bread, this is a recipe for you.

It comes from my friend Dina, and although she gave me the recipe a while back, I didn't really start making it until a few weeks ago. I am dumbfounded at how easy it is to make. And it doesn't involve any rising or resting time. In fact it's some strange cross between a quick bread and a yeast bread.

It is yummy, buttery and delicious. I want to try it soon as muffins, but haven't had the chance yet. And I think some sharp cheddar cheese added to the batter could be heavenly. But making it just as this recipe suggests is plenty good. Dina suggests using a light beer, although thanks to the dark, seasonal beers Seth likes, I've used a couple of different varieties, all with tasty results.

So bake this bread up alongside a soup or stew, and I guarantee your family won't be disappointed.

Dina's Beer Bread

3 cups all-purpose flour
1/2 cup sugar
1 tablespoon baking powder
1/2 teaspoon salt
12-ounce beer
1/4 cup butter, melted

Mix dry ingredients in a bowl. Add beer and mix. Pour into greased pan and bake for 1 hour at 350 degrees. Half way through the cooking time, remove bread and pour melted butter over top. Return to oven and continue baking. Cool slightly before slicing.

21 December 2009

Thank you, Norma


After the last post about Aunt Joan's Molasses Crinkles, I got a note from an old college professor, Norma Wilson.

Norma probably has more special meaning to me than she even knows. She was the one who encouraged me to apply for a position on the campus newspaper staff. In her writing lab I learned things I'd never heard of before like search engines (come on folks, it was 1998) and how to turn an interview into a written piece. It sounds so silly writing this that these would be things someone would teach you, but she did. And out of all of my college professors, I rank her up there pretty high in terms of the skills she taught me, both about newspapers and life.

I did land that job at the campus newspaper, but most importantly, I met this guy who work there who was nerdy cute with his glasses and huge sideburns. Turns out I must have been nerdy cute to him, too. We dated, moved across the country together, got married and are living happily (yes, we have our bad days, but give us some perspective, folks) ever after.

Norma, I thank you.


But I also thank her for reminding me that one year I brought her some of my mom's Peanut Butter Cup Cookies. In that note she sent last week, she told me that she still makes them every year at Christmas. So perhaps my cookie recipe will offer up some of what I owe her. Of course, I do hope a heavy dose of gratitude settles my debt.

My mother has made these cookies for as far back as I can remember. I've seen similar versions with chocolate kisses, but I've not seen anyone else create this combination. If you like peanut butter and chocolate, you can't go wrong. My mom always made them with the store-bought refrigerated cookie dough that comes in logs. That made it super easy to bake the cookies. I can't seem to find peanut butter cookie dough at the store any more, so I made my own. The only special tool you need is a mini-muffin tin.


The one thing you need to know is that you need all of your peanut butter cups unwrapped before the cookies come out of the oven. And be careful, it's hard not to eat one or two while you unwrap a few dozen!


Peanut Butter Cup Cookies
Cookie Dough recipe adapted from Better Homes & Gardens Cook Book

makes two dozen

1/2 cup butter

1/2 cup peanut butter
1/2 cup granulated sugar

1/2 cup brown sugar
1/2 teaspoon baking soda

1/2 teaspoon baking powder

1 egg

1/2 teaspoon vanilla

1 1/4 cups all-purpose flour
Wax paper

24 Reese's Mini Peanut Butter Cups, unwrapped


In a large mixing bowl beat the butter and peanut butter with an electric mixer for about 30 seconds or until combined. Add the granulated sugar, brown sugar, baking soda and baking powder. Beat until combined. Beat in the egg and vanilla until combined. Slowly add flour, combining as you go. Lay a large sheet of wax paper flat and dump the dough onto the paper. Using the paper to keep your hands from sticking to the dough, roll the dough into a log roughly 12 to 14 inches long. Chill for one hour or freeze for later use. Using a non-stick spray, coat your mini-muffin tin. Slice the dough into roughly 3/4-inch discs. Quarter each disc and drop one of those quarters into each muffin hole. Bake at 375 degrees for about 7 minutes or until the cookies are puffed and slightly browned. Remove from the oven and immediately stuff the unwrapped peanut butter cups into the middle of each cookie, leaving the entire cookie in the tin. Let the cookies rest for about 15 minutes and then carefully remove them from the tin and place on a cooling rack. Either refrigerate or let stand uncovered long enough for the chocolate in the cookies to harden once again. Store in an airtight container.